winter park travel guide

Renowned for its world-class skiing and picturesque Rocky Mountain setting, Winter Park offers a charming blend of adventure and relaxation. Perfect for families, couples, and solo travelers seeking unforgettable experiences. The town’s cozy streets, scenic beauty, and year-round activities make it a must-visit destination in Colorado.

1.1 Overview of Winter Park as a Travel Destination

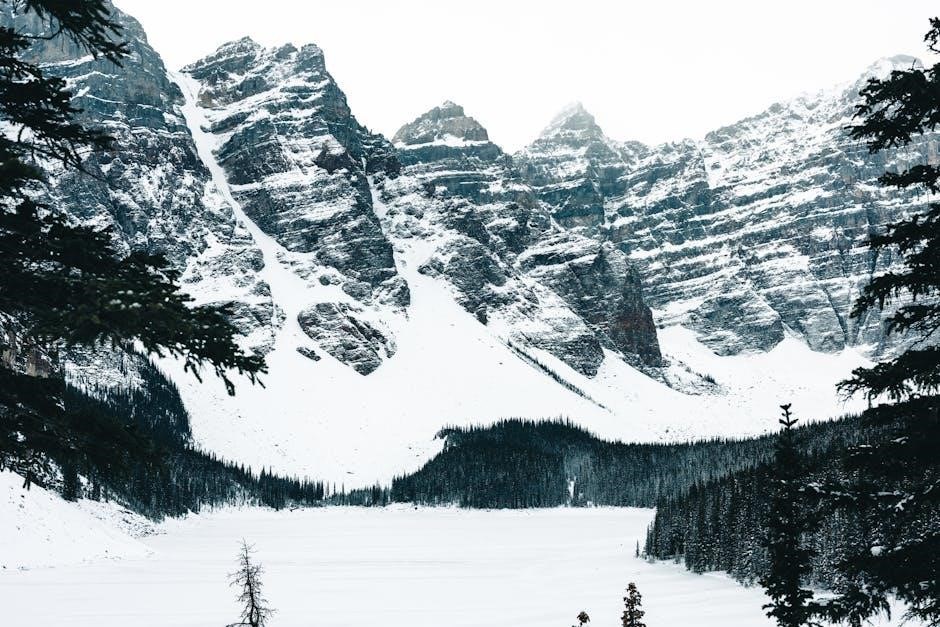
Winter Park is a year-round destination nestled in the Rocky Mountains, offering a mix of outdoor adventures and serene landscapes. Known for its world-class skiing, it also features hiking trails, scenic vistas, and a charming downtown. Families, couples, and adventure seekers alike find endless opportunities for exploration, making it a top Colorado getaway for all seasons.

1.2 Brief History and Cultural Significance

Founded in 1896, Winter Park’s history is deeply rooted in mining and railroads. It evolved into a premier ski destination in the 20th century, blending outdoor recreation with a charming mountain town vibe. The area’s cultural significance lies in its natural beauty, hosting festivals and events that celebrate its heritage, making it a beloved Colorado retreat for generations of travelers.

Best Time to Visit Winter Park

Winter Park is a year-round destination, with winter offering world-class skiing and summer providing endless outdoor adventures. Visit from December to April for snow sports or June to September for warmer explorations. Shoulder seasons offer quieter experiences and great deals.

2.1 Seasonal Weather Patterns

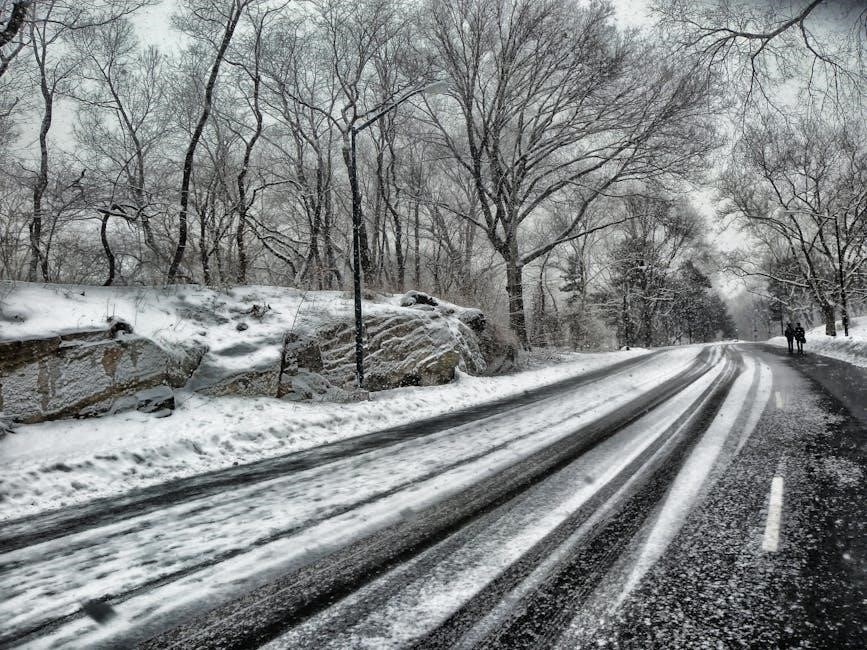
Winter Park experiences distinct seasons, with heavy snowfall from December to March, ideal for skiing. Summers are warm, from June to September, offering perfect conditions for hiking and biking. Spring and fall bring mild temperatures, with vibrant foliage in autumn and blooming wildflowers in spring, creating a picturesque setting for outdoor adventures year-round.

2.2 Peak Tourist Seasons and Festivals

Winter Park’s peak tourist season is winter (December to April), attracting skiers and snowboarders. Summer (June to September) is ideal for hiking and mountain biking. Year-round, visitors enjoy festivals like the Winter Park Beer Festival and Winter Park Resort’s seasonal events, offering entertainment for all ages and interests.

How to Get to Winter Park

Winter Park is accessible via Denver International Airport (DEN), with shuttle services and car rentals available. The scenic drive offers stunning Rocky Mountain views year-round.

3.1 Nearest Airports and Transportation Options

Denver International Airport (DEN) is the closest major airport, 67 miles from Winter Park. Shuttle services, rental cars, and public transit options are available. Regional airports like Eagle County (EGE) and Colorado Springs (COS) offer alternatives. Rental cars are recommended for flexibility, while ski shuttles provide convenient access to the resort. The scenic drive from Denver is about two hours.

3.2 Public Transport and Rental Services

Winter Park offers convenient public transport options, including The Lift bus service linking to nearby towns. Rental cars are widely available at Denver International Airport and locally, providing flexibility for exploring. Ski shuttles and shared rides are cost-effective alternatives. Book in advance for the best rates, especially during peak seasons.

Must-See Attractions in Winter Park

Winter Park captivates visitors with its mix of outdoor recreation and scenic beauty, offering skiing, hiking, and a charming town with shops and dining. Perfect for year-round adventures.

4.1 Historical Landmarks and Monuments

Winter Park boasts a rich history, with landmarks like the Cozens Ranch Museum, showcasing the region’s pioneering spirit. The museum, housed in an 1860s homestead, highlights early settlers’ lives. Nearby, Vasquez Road offers a glimpse into the area’s historical connections. The Winter Park Museum further explores the town’s founding and development, preserving its cultural heritage for visitors to discover and appreciate.

4.2 Parks and Nature Reserves

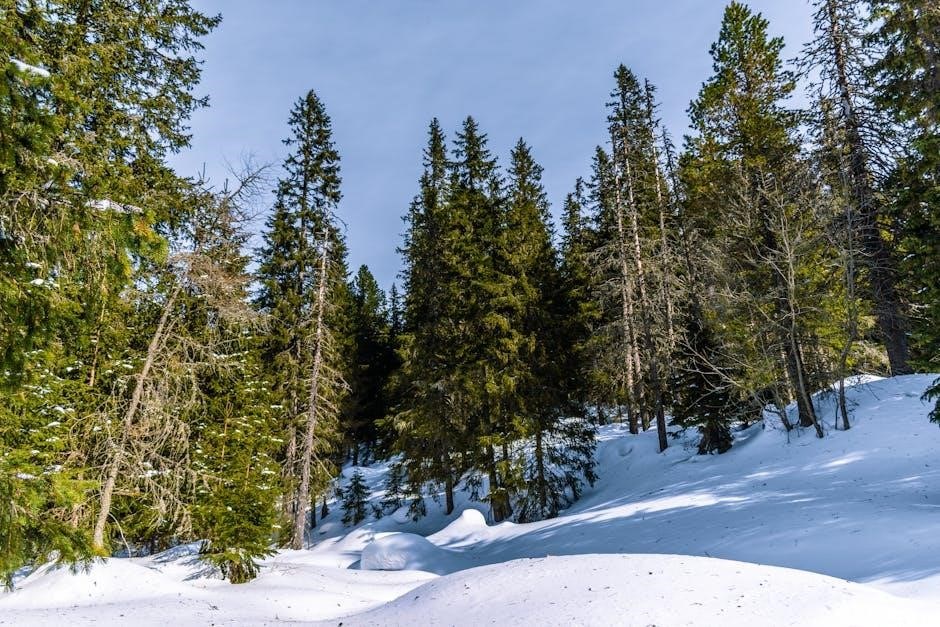
Winter Park is surrounded by stunning parks and nature reserves, offering endless opportunities for outdoor exploration. Vasquez Park provides picnic areas and scenic views, while the nearby trails lead to breathtaking mountain vistas. The Arapaho National Forest and Fraser Valley offer pristine landscapes for hiking, biking, and wildlife spotting. These natural gems make Winter Park a haven for nature lovers and adventure seekers alike.

4.3 Museums and Art Galleries

Winter Park boasts a vibrant cultural scene, with museums and galleries showcasing local history and art. The Winter Park Museum offers insights into the town’s heritage, while the Charles A. Munn Museum features exhibits in a historic home. The Winter Park Art Gallery highlights works by local artists, and the Cozens Museum in nearby Fraser explores regional history and wildlife. These venues provide a perfect blend of art, history, and culture for visitors to enjoy. The town’s museums also host seasonal exhibits, making them a must-visit for both locals and travelers.

Outdoor Activities in Winter Park

Winter Park offers endless outdoor adventures, from skiing and snowboarding to hiking and snowshoeing. Explore trails like Vasquez Ridge or enjoy ice skating and sledding for family fun.

5.1 Skiing and Snowboarding Opportunities

Winter Park is a paradise for skiers and snowboarders, offering diverse terrain for all skill levels. From gentle groomers to challenging back bowls, the resort boasts over 3,000 acres of skiable land. The Vasquez Ridge area provides stunning views, while Powderhound serves up fresh tracks. Night skiing adds an extra thrill, and the ski school offers expert lessons for beginners. Equipment rentals and convenient lift access ensure a seamless experience;

5.2 Hiking and Snowshoeing Trails

Winter Park boasts an extensive network of trails perfect for hiking and snowshoeing. The Fraser River Trail offers a family-friendly route, while more challenging paths like Devil’s Thumb Trail reward hikers with stunning views. Snowshoeing enthusiasts can explore serene forests and meadows, with guided tours available for those seeking a deeper connection with nature. The scenic beauty of Winter Park’s trails is unmatched.

5.3 Ice Skating and Winter Sports

Winter Park offers a variety of ice skating rinks, including the popular Winter Park Ice Rink, perfect for both beginners and experienced skaters. Additional winter sports include snow tubing, sledding, and horse-drawn sleigh rides. The town’s festive atmosphere, with twinkling lights and snow-covered landscapes, creates a magical setting for enjoying these activities with family and friends or exploring unique winter experiences like ice hockey tournaments and curling events.

Dining and Nightlife in Winter Park

Discover Winter Park’s vibrant dining scene, featuring farm-to-table restaurants, cozy cafes, and craft breweries. Enjoy live music and cocktails at stylish bars, perfect for apres-ski relaxation.

6.1 Top-Rated Restaurants and Cafes

Winter Park boasts a variety of top-rated dining spots, from cozy cafes to elegant restaurants. The Perk serves excellent coffee and pastries, while The Lodge at Valley Junction offers hearty American fare. For a fine dining experience, try The Gazebo at The Vintage Hotel, known for its contemporary dishes. These eateries cater to diverse tastes, ensuring memorable meals in a charming mountain setting.

6.2 Local Cuisine and Specialties

Winter Park’s culinary scene features a mix of hearty mountain dishes and artisanal delights. Savor local specialties like Rocky Mountain oysters, bison burgers, and high-altitude roasted coffee. Don’t miss the farm-to-table restaurants offering fresh, seasonal ingredients. The town’s cozy eateries and cafes serve up everything from gourmet sandwiches to homemade pies, catering to all palates and preferences.

6.3 Bars and Entertainment Venues

Winter Park’s nightlife thrives with cozy bars, craft breweries, and lively entertainment spots. Popular venues like The Village at Winter Park offer live music and themed nights. Enjoy handcrafted cocktails, local beers, or wine while soaking in the mountain ambiance. These spots are perfect for unwinding after a day on the slopes or connecting with fellow travelers.

Accommodation Options in Winter Park

Winter Park offers diverse lodging, from luxury resorts and cozy cabins to budget-friendly hotels, ensuring options for every traveler’s preferences and budget.

7.1 Luxury Hotels and Resorts

Winter Park’s luxury hotels and resorts offer premium amenities, such as private spas, gourmet dining, and stunning mountain views. Resorts like The Lodge at Winter Park and Devil’s Thumb Ranch provide elegant accommodations, perfect for a luxurious getaway. These high-end properties cater to travelers seeking comfort, sophistication, and unparalleled access to outdoor adventures, making them ideal for special occasions or indulgent escapes.

7.2 Budget-Friendly Lodging and Hostels

Winter Park offers affordable lodging options for travelers on a budget. Hostels like The Vintage Hotel and Winter Park Hostel provide cozy rooms and shared spaces at reasonable rates. These budget-friendly accommodations are perfect for solo travelers or groups, offering basic amenities and a social atmosphere. They are ideally located near the town’s main attractions, making them great value for exploring the area without breaking the bank.

7.3 Vacation Rentals and Cabins

Vacation rentals and cabins in Winter Park offer a cozy, home-away-from-home experience. Options range from rustic mountain cabins to spacious chalets, ideal for families or groups. Many rentals feature fully-equipped kitchens, fireplaces, and scenic views. Platforms like Airbnb and VRBO provide a wide selection, allowing travelers to enjoy privacy and comfort while staying close to Winter Park’s outdoor attractions and activities year-round.

Explore beyond Winter Park with day trips to nearby attractions, offering stunning natural beauty, charming towns, and unique experiences. Perfect for adventure-seekers and those seeking relaxation.

8.1 Nearby Towns and Villages to Explore

Discover charming nearby towns like Grand Lake, Estes Park, and Fraser, each offering unique attractions. Grand Lake features lakeside views and boating, while Estes Park is perfect for wildlife enthusiasts. Fraser offers peaceful trails, and Nederland captivates with its quirky vibe. Explore historic Idaho Springs for hot springs and mining history. These towns provide a blend of nature, culture, and relaxation, adding depth to your Winter Park adventure.

Day Trips and Excursions

8.2 Guided Tours and Adventure Packages

Experience Winter Park with expert-guided tours offering unique adventures. From snowshoeing and hiking excursions to scenic photography tours, these packages provide unforgettable experiences. Explore remote trails, spot wildlife, or enjoy thrilling snowmobiling trips. Customizable options cater to all skill levels, ensuring safety and memorable moments. Guided tours offer insider knowledge, making your Winter Park adventure both enriching and exhilarating.

Budget and Cost Considerations

Plan your Winter Park trip with budget-friendly options. Average accommodation costs range from $100 to $300 per night, while meals start at $15. Book early for discounts and explore free activities like hiking to save money. Consider budget-friendly lodging and pack snacks to reduce expenses.

9.1 Average Costs for Accommodation and Food

Winter Park offers a range of accommodation options, with hotel prices averaging $150–$400 per night and vacation rentals starting at $100. Meals at local restaurants typically cost $15–$30 per person, while groceries for self-catering average $50–$75 per week. Budget-friendly options like cafes and food trucks can help reduce costs, but prices may rise during peak seasons;

9.2 Tips for Saving Money During Your Trip

Plan ahead by booking accommodations and lift tickets in advance for discounts. Opt for self-catering to reduce dining costs and pack snacks for day trips. Utilize free shuttle services and explore complimentary activities like hiking or visiting local parks. Consider off-peak visits for lower rates and look for package deals or seasonal specials to maximize savings.

Safety and Health Tips

Winter Park’s high altitude requires staying hydrated and dressing warmly. Check weather forecasts before heading out and be prepared for changing conditions. Stay safe and healthy during your visit!

10.1 Winter Safety Precautions

Check weather forecasts before outdoor activities and dress warmly in layers. Stay hydrated to combat high altitude, and use sunscreen to protect against intense UV rays. Ensure proper gear for skiing or hiking, and carry an emergency kit. Be mindful of avalanche risks in backcountry areas and stay informed about trail conditions. Always travel with a buddy and let someone know your itinerary. Respect the environment and wildlife to ensure a safe and enjoyable experience.

10.2 Local Health Services and Emergency Contacts

Winter Park has reliable medical facilities, including the Winter Park Medical Center, offering urgent care and emergency services. For critical situations, dial 911. Keep emergency contact numbers handy, such as the local hospital and poison control. Altitude sickness is common; drink plenty of water and rest if symptoms arise. Know the location of the nearest clinic for minor injuries or illnesses.

Cultural and Local Events

Winter Park hosts vibrant festivals celebrating music, food, and art, offering a glimpse into its rich cultural heritage. Attend seasonal events like hāngi feasts or local traditions.

11.1 Seasonal Festivals and Celebrations

Winter Park comes alive with seasonal festivals, offering a vibrant mix of music, food, and culture. Enjoy the Winter Park Winterfest, featuring ice sculptures and live performances. Summer brings outdoor concerts and art exhibitions, while autumn highlights local harvests and traditions. These events showcase the town’s spirit and provide unforgettable experiences for visitors of all ages.

11.2 Local Traditions and Customs

Winter Park embraces a rich cultural heritage, with traditions rooted in its mining history and outdoor lifestyle. Locals celebrate community gatherings, seasonal parades, and cultural events. The town’s welcoming atmosphere fosters a strong sense of camaraderie, reflected in its annual traditions. Visitors can experience authentic mountain customs, from hearty local cuisine to outdoor activities that define the spirit of Winter Park.

Winter Park offers year-round adventures, from skiing to hiking. Plan ahead, immerse in the culture, and create unforgettable memories in this Rocky Mountain gem.

12.1 Summary of Key Points

Winter Park is a year-round destination offering skiing, hiking, and biking. Its charming town, scenic beauty, and vibrant culture make it ideal for families and adventurers. Plan ahead, explore local cuisine, and enjoy outdoor activities while respecting nature. With budget tips and safety advice, your trip will be memorable and stress-free in this Rocky Mountain gem.

12.2 Final Recommendations for Travelers

Plan ahead by booking accommodations and activities early, especially during peak seasons. Pack layers for unpredictable mountain weather and don’t forget sunscreen. Take advantage of free public transport and consider renting equipment. Explore local cuisine, attend cultural events, and embrace outdoor adventures. Check weather forecasts and stay hydrated. Enjoy the scenic beauty responsibly and make unforgettable memories in Winter Park.

tmj stretches pdf

Regular TMJ stretches improve joint mobility, relieve muscle tension, and prevent dysfunction. Gentle exercises can be done at home, tailored to individual needs, and complement professional treatments effectively.

What is the TMJ?

The temporomandibular joint (TMJ) is a complex joint located just in front of the ear, connecting the mandible (jawbone) to the skull. It facilitates essential movements like chewing, speaking, and yawning. The TMJ contains a disc that cushions the joint, enabling smooth motion. Proper function of the TMJ is crucial for daily activities and overall facial comfort. Understanding its structure and role is key to addressing TMJ-related issues and performing effective stretches to maintain joint health and mobility.

Understanding TMJ Dysfunction

Temporomandibular joint dysfunction (TMD) refers to a range of disorders affecting the TMJ and surrounding muscles. It often results from inflammation, misalignment, or muscle imbalances. Common symptoms include jaw pain, clicking or popping sounds, limited mobility, and radiating discomfort to the face or ears. TMD can stem from habits like teeth grinding, trauma, or chronic stress. Accurate diagnosis is crucial to address the root cause and implement effective treatments. Proper understanding of TMJ dysfunction helps individuals recognize early signs and seek timely interventions, such as targeted stretches and exercises, to restore joint function and alleviate discomfort. Early management can prevent progression and improve quality of life. Recognizing triggers and adopting preventive measures is key to maintaining long-term TMJ health and function.

Preparing for TMJ Stretches

Begin with gentle lifestyle changes, such as avoiding hard foods and stress reduction. Use tools like massage rollers or resistance devices to enhance stretching effectiveness and comfort.

Lifestyle Modifications for TMJ Health

Adopting a soft food diet and avoiding hard or chewy foods can reduce jaw strain. Stress reduction techniques, such as meditation or yoga, help minimize clenching and grinding habits. Improving posture, especially head and neck alignment, alleviates unnecessary pressure on the TMJ. Avoiding gum chewing and excessive jaw movements is also beneficial. Staying hydrated and maintaining a balanced diet supports overall muscle health. Regular exercise can enhance blood flow and reduce muscle tension around the jaw. Additionally, quitting smoking and limiting caffeine intake may reduce TMJ-related discomfort. These lifestyle changes, combined with consistent stretching exercises, create a holistic approach to managing TMJ dysfunction and promoting long-term jaw health.

Essential Tools for TMJ Exercises

Several tools can enhance the effectiveness of TMJ stretches and exercises. A foam roller or soft massage ball is ideal for gentle self-massage to relax the jaw, neck, and facial muscles. Resistance devices, such as TheraBand® or jaw exercisers, can strengthen the muscles around the TMJ without causing strain. Heat or cold packs are useful for relieving pain and stiffness before or after exercises. A mirror can help monitor jaw alignment and movement during exercises. Additionally, downloadable PDF guides provide detailed instructions and illustrations for proper technique. Using these tools under professional guidance ensures safe and effective progress in managing TMJ dysfunction and improving jaw function. Regular use of these tools can complement daily stretching routines and promote long-term jaw health.

Types of TMJ Stretches

TMJ stretches include isometric exercises, isotonic stabilization, and self-mobilization techniques. These exercises target jaw muscles, improving flexibility and reducing tension to alleviate TMJ dysfunction symptoms effectively.

Isometric Exercises for TMJ

Isometric exercises involve contracting jaw muscles without movement. These exercises are ideal for strengthening and stabilizing the TMJ. Sit comfortably, place a finger on your jaw, and gently press against it while resisting with your finger for 5-10 seconds. Repeat 10-15 times, 3-5 times daily. This helps improve muscle tone and balance. For lateral movements, press your finger against your jaw while attempting to move it side-to-side. Hold each position for 5-10 seconds, alternating sides. Avoid pain; stop if discomfort arises. These exercises are low-risk and can be done anywhere, making them a convenient addition to your daily routine.

Isotonic Stabilization Exercises

Isotonic stabilization exercises focus on strengthening the TMJ muscles while maintaining proper jaw alignment. These exercises involve controlled movements against resistance, such as opening or closing the jaw slowly. One effective exercise is to place your fingers on your jaw and gently resist as you try to open your mouth. Hold for 5-10 seconds, then release. Repeat 10-15 times. Another exercise involves resisting lateral jaw movements, pressing your jaw from side to side while maintaining resistance. These exercises improve muscle balance and joint stability, reducing symptoms of TMJ dysfunction. Perform them 2-3 times daily, ensuring smooth, deliberate movements. Avoid bouncing or forcing your jaw beyond a comfortable range. Over time, these exercises help restore normal jaw function and reduce pain during chewing or speaking.

Self-Mobilization Techniques

Self-mobilization techniques empower individuals to manage TMJ dysfunction independently. These exercises focus on improving joint mobility and reducing stiffness. Gentle jaw opening exercises, where you open your mouth as far as comfortable without pain, can be done 5-10 times daily. Lateral jaw movements, sliding your jaw from side to side, help restore natural range of motion. Posture correction exercises, such as chin tucks, also support TMJ alignment. To perform a chin tuck, stand tall, look straight ahead, and gently push your chin back toward your neck, holding for 5 seconds. Breathe naturally and avoid forcing your jaw beyond a comfortable range. Regular practice of these techniques can enhance joint flexibility, reduce discomfort, and improve overall jaw function. Consistency is key for long-term benefits, so incorporate these exercises into your daily routine, ideally 2-3 times a day.

Advanced TMJ Stretching Techniques

Advanced techniques focus on improving posture, head alignment, and deep muscle relaxation. These exercises enhance joint mobility and strength, promoting long-term relief from TMJ discomfort and dysfunction effectively.

Posture and Head Flexion Exercises

Posture and head flexion exercises are crucial for TMJ health, as poor alignment can exacerbate joint strain. Start by sitting tall with shoulders relaxed. Perform chin tucks: stand or sit straight, look ahead, and gently tuck chin toward chest. Hold for 5-10 seconds, repeat 10-15 times. Shoulder rolls can also help reduce tension. Gently roll shoulders forward and backward in a circular motion for 10 repetitions. These exercises improve cervical spine alignment, reducing pressure on the TMJ. Practice daily to promote proper head and neck positioning. For advanced techniques, incorporate gentle head flexion: slowly tilt head forward, keeping ears aligned with shoulders, and hold for 5 seconds. Avoid forcing the movement. Regular practice enhances posture and reduces TMJ discomfort effectively.

Neck Extension and Jaw Alignment

Neck extension and jaw alignment exercises are essential for maintaining proper TMJ function. Start by standing or sitting with good posture. Slowly tilt your head back, keeping your chin up, and look at the ceiling. Hold for 5-10 seconds, then return to the starting position. Repeat 8-10 times. This helps reduce forward head posture, which can strain the TMJ. For jaw alignment, place your fingers gently on your jaw and guide it from side to side, ensuring smooth movement. Avoid forcing the jaw beyond a comfortable range. Perform this exercise 5-7 times, focusing on controlled motions. Strengthening neck muscles through extension also supports jaw stability. Practice these exercises daily to improve alignment and reduce TMJ-related discomfort. Consistency is key for long-term benefits and preventing dysfunction.

Safety and Precautions

Always stretch gently and within pain limits. Avoid bouncing or forcing movements, as this may worsen TMJ issues. Stop if dizziness or increased pain occurs, and consult a professional if symptoms persist.

Understanding Pain Limits During Exercises

Understanding your pain limits during TMJ exercises is crucial for safe and effective progress. Mild discomfort may be expected, but sharp pain or worsening symptoms signal the need to stop. Avoid pushing through pain, as this can exacerbate TMJ dysfunction. Exercises should be performed within a pain-free range or with minimal discomfort. If pain increases, discontinue the stretch immediately and consult a healthcare professional. It’s important to differentiate between muscle tension and harmful pain. Breathe naturally and avoid forcing movements. Gradual progression is key to healing without causing further damage. Always prioritize gentle, controlled motions to protect the joint and surrounding muscles. Stop if dizziness or severe discomfort occurs, as this may indicate overexertion or improper technique.

When to Stop or Modify Stretches

It’s essential to know when to stop or modify TMJ stretches to avoid worsening symptoms. If you experience sharp pain, dizziness, or a significant increase in discomfort, discontinue the exercise immediately. Mild tension is acceptable, but severe pain indicates the need to stop. If symptoms persist or worsen, consult a healthcare professional for guidance. Avoid the “no pain, no gain” mentality, as it can lead to further injury. Modify stretches by reducing intensity or range of motion if discomfort arises. Gentle adjustments can help maintain progress without risking harm. Overexertion should be avoided, as it may exacerbate TMJ dysfunction. Always prioritize cautious, controlled movements to ensure safe and effective results.

Resources for TMJ Stretches

Downloadable PDF guides provide comprehensive exercise routines, diagrams, and instructions for TMJ stretches. These resources are ideal for home use and offer step-by-step guidance for relief.

Downloadable PDF Guides for TMJ Exercises

Downloadable PDF guides are an excellent resource for managing TMJ dysfunction. They provide detailed instructions, diagrams, and illustrations of exercises tailored to improve joint mobility and reduce pain. Many guides include step-by-step routines for isometric, isotonic, and self-mobilization techniques, ensuring users can perform stretches safely at home. These resources often incorporate lifestyle tips and posture exercises, emphasizing the importance of consistency for optimal results. Additionally, some PDFs offer customizable plans to suit individual needs, making them versatile tools for patients seeking relief from TMJ-related discomfort. Accessing these guides allows individuals to take a proactive approach to their treatment, supported by professional recommendations and clear visual aids. Regular use of these exercises, as outlined in the PDFs, can significantly enhance jaw function and overall well-being.

jeep grand cherokee 2012 owners manual

The 2012 Jeep Grand Cherokee Owners Manual is a comprehensive guide designed to help drivers understand and maintain their vehicle effectively. It covers essential information on driving, maintenance, troubleshooting, and customization, ensuring a safe and optimal driving experience.

1.1 Importance of the Owners Manual

The 2012 Jeep Grand Cherokee Owners Manual is crucial for safe and efficient vehicle operation. It provides detailed guidance on driving, maintenance, and troubleshooting, ensuring owners understand their vehicle’s capabilities and limitations. Regular use of the manual helps prevent errors, enhances safety, and prolongs the vehicle’s lifespan. It also serves as a reference for customization and upgrading, making it an indispensable resource for every Jeep Grand Cherokee owner.

1.2 Overview of the Manual’s Content

The 2012 Jeep Grand Cherokee Owners Manual offers a detailed overview of the vehicle’s features, maintenance schedules, and troubleshooting tips. It includes sections on engine performance, drivetrain options, interior technology, and off-road capabilities. The manual also covers emergency procedures, safety guidelines, and technical specifications, providing a complete guide for owners to optimize their driving experience and maintain their vehicle effectively.

Key Features of the 2012 Jeep Grand Cherokee

The 2012 Jeep Grand Cherokee boasts robust engine options, advanced drivetrain systems, premium interior technology, and exceptional off-road capabilities, making it a versatile and powerful SUV.

2.1 Engine Options and Performance

The 2012 Jeep Grand Cherokee offers a range of powerful engine options, including a 3.6L V6 and a 5.7L V8, delivering impressive horsepower and torque for both on-road and off-road performance. The V6 engine provides efficient fuel economy, while the V8 offers superior towing capacity. Both engines feature advanced technologies like variable valve timing (VVT) and fuel-saving cylinder deactivation, ensuring a balance of power and efficiency.

2.2 Drivetrain and Off-Road Capabilities

The 2012 Jeep Grand Cherokee features advanced drivetrain systems, including Quadra-Trac I and Quadra-Trac II, offering enhanced traction and control. Quadra-Drive II with an electronic limited-slip differential provides superior off-road performance. The Selec-Terrain traction control system allows drivers to customize settings for various terrains like Sand, Mud, and Rock. These systems, combined with high ground clearance and skid plates, make the Grand Cherokee a formidable off-road vehicle.

2.3 Interior and Technology Features

The 2012 Jeep Grand Cherokee offers a premium interior with comfortable seating, ample cargo space, and advanced technology features. The UConnect infotainment system provides voice command, Bluetooth connectivity, and navigation capabilities. Additional features include a USB port, auxiliary input, and steering wheel-mounted controls for convenient operation. The interior is designed for both comfort and functionality, ensuring a satisfying driving experience.

How to Use the Owners Manual Effectively

Use the 2012 Jeep Grand Cherokee Owners Manual by referencing the table of contents for quick navigation. Utilize the full-screen view for better readability and understanding of key features and instructions. Familiarize yourself with symbols and terminology to ensure safe and proper vehicle operation. Regularly review updates and guidelines for optimal driving experience.

3.1 Navigating the Manual’s Structure

The 2012 Jeep Grand Cherokee Owners Manual is organized into clear sections, starting with a table of contents for easy navigation. Use the full-screen view to enhance readability. Icons and headings guide users to specific topics, such as maintenance, safety, and technical details. A detailed index at the end allows quick access to key information, making it easier to find what you need efficiently.

3.2 Understanding Symbols and Terminology

The 2012 Jeep Grand Cherokee Owners Manual uses specific symbols and terminology to convey information efficiently. Familiarize yourself with these icons, such as warning signs for safety alerts or gear icons for transmission details. A comprehensive legend at the beginning of the manual decodes these symbols, ensuring clarity and ease of understanding. Understanding this terminology is crucial for vehicle maintenance and operation.

Maintenance and Service Schedule

The 2012 Jeep Grand Cherokee Owners Manual outlines a detailed maintenance schedule to ensure optimal vehicle performance and longevity. Regular checks and services are essential.

4.1 Recommended Maintenance Intervals

The 2012 Jeep Grand Cherokee Owners Manual specifies regular maintenance intervals to ensure vehicle reliability. Oil changes are recommended every 5,000 to 7,500 miles, while tire rotations should occur every 6,000 to 8,000 miles. Brake pads and fluids should be inspected every 12,000 miles. Following these intervals helps prevent wear and tear, ensuring optimal performance and extending the vehicle’s lifespan. Always consult the manual or a certified dealership for precise scheduling.

4.2 DIY Maintenance Tips

The 2012 Jeep Grand Cherokee Owners Manual provides DIY maintenance tips to help owners save money and stay proactive. Regular oil changes, air filter replacements, and battery checks are emphasized. Drivers are advised to follow the manual’s guidelines for safety and effectiveness. These tips empower owners to handle basic upkeep independently, ensuring their vehicle runs smoothly and efficiently over time.

Safety Features and Precautions

The 2012 Jeep Grand Cherokee Owners Manual highlights essential safety features and precautions to ensure a secure driving experience. Always read the manual before driving to understand controls and handling on various road surfaces.

5.1 Emergency Procedures

The 2012 Jeep Grand Cherokee Owners Manual provides detailed emergency procedures to ensure driver and passenger safety. Familiarize yourself with controls and safe stopping techniques. In case of a breakdown, use hazard lights and warning triangles for visibility. Understand handling on various road surfaces and follow guidelines for emergencies like tire blowouts or system malfunctions. Always refer to the manual for specific safety protocols.

5.2 Safety Guidelines for Off-Road Driving

Always inspect your vehicle before off-road adventures, ensuring all systems are functional. Use four-wheel drive appropriately for terrain conditions. Reduce speed on uneven surfaces and avoid sharp turns. Never overload the vehicle or exceed its payload capacity. Be aware of your surroundings, including obstacles and weather conditions. Avoid driving through deep water without proper equipment. Follow environmental guidelines to preserve natural habitats and minimize impact. Practice safe driving techniques to enhance your off-road experience.

Technical Specifications

The 2012 Jeep Grand Cherokee features V6 and V8 engine options, Quadra-Trac II 4WD system, with towing capacity up to 7,400 lbs and a 24.6-gallon fuel tank.

6.1 Vehicle Dimensions and Capacities

The 2012 Jeep Grand Cherokee offers a curb weight of 4,650 lbs, with a wheelbase of 114.3 inches and ground clearance of 8.6 inches. Its towing capacity reaches up to 7,400 lbs, while the fuel tank holds 24.6 gallons. These dimensions and capacities ensure versatility for both on-road comfort and off-road adventures, making it a reliable choice for various driving needs.

6.2 Engine and Transmission Details

The 2012 Jeep Grand Cherokee features a 3.6L V6 engine delivering 290 horsepower and a 5.7L V8 engine providing 360 horsepower. Both engines are paired with a 5-speed automatic transmission, offering smooth shifting and optimal performance. The V8 includes fuel-saving cylinder deactivation. Quadra-Trac and Selec-Terrain systems enhance traction control, ensuring superior off-road capabilities while maintaining on-road efficiency and responsiveness.

Troubleshooting Common Issues

The manual provides detailed guidance for diagnosing and resolving common issues, such as error codes and system warnings, ensuring drivers can address problems efficiently and safely.

7.1 Diagnosing Common Problems

The manual offers a systematic approach to identifying issues, such as error codes and warning lights. It guides drivers through checking systems like the engine, transmission, and suspension. By referencing the OBD-II system and troubleshooting charts, owners can pinpoint problems efficiently. Detailed steps help resolve common issues, ensuring safety and preventing further damage. Regular checks and understanding dashboard indicators are emphasized for proactive maintenance.

7.2 Resetting Warning Lights and Codes

The manual provides clear instructions for resetting warning lights and error codes on the 2012 Jeep Grand Cherokee. Procedures include using the OBD-II system or specific button combinations on the dashboard. After addressing the underlying issue, the system can be reset, ensuring the vehicle operates correctly. If lights persist, professional diagnosis is recommended to avoid further complications. Regular resets help maintain accurate system monitoring and performance.

Customization and Upgrades

The 2012 Jeep Grand Cherokee owners manual highlights customization options and upgrades to enhance performance and appearance. It guides owners on approved modifications and aftermarket parts compatibility, ensuring safety and functionality are maintained while personalizing the vehicle to individual preferences.

8.1 Approved Modifications

The 2012 Jeep Grand Cherokee owners manual outlines approved modifications to enhance performance and appearance while maintaining safety standards. It specifies that aftermarket parts must meet Chrysler Group LLC requirements to avoid voiding warranties. Modifications like engine performance upgrades or suspension improvements are allowed if they align with the vehicle’s design specifications. Always consult the manual or authorized dealers before making changes to ensure compatibility and functionality.

8.2 Impact of Aftermarket Parts

Aftermarket parts can enhance performance and aesthetics but may void warranties or cause operational issues if not approved. The manual warns that non-compliant modifications can lead to safety risks or system malfunctions. It’s crucial to ensure all aftermarket components meet Chrysler Group LLC standards to maintain vehicle integrity and avoid potential damage or legal repercussions. Always consult authorized dealers before installation.

Environmental Considerations

This section provides tips on eco-friendly driving practices and fuel efficiency to minimize environmental impact while ensuring compliance with emissions standards for the 2012 Jeep Grand Cherokee;

9.1 Fuel Efficiency Tips

Optimize fuel efficiency by driving smoothly, maintaining proper tire pressure, and reducing idling. Use cruise control on highways and remove roof racks when not needed to minimize drag. Regularly servicing the engine and ensuring proper wheel alignment also improve fuel economy. These practices help reduce fuel consumption and lower emissions for the 2012 Jeep Grand Cherokee.

9.2 Eco-Friendly Driving Practices

To promote eco-friendly driving, maintain moderate speeds and avoid aggressive acceleration. Use the correct gear for terrain to reduce engine strain. Minimize idling and ensure proper wheel alignment. Regularly check and replace air filters to improve combustion efficiency. These practices not only reduce environmental impact but also enhance the overall performance of your 2012 Jeep Grand Cherokee.

The 2012 Jeep Grand Cherokee Owners Manual is an essential resource for optimizing vehicle performance, safety, and longevity. Regularly referencing it ensures informed ownership and maintenance.

10.1 Final Thoughts on the Manual

The 2012 Jeep Grand Cherokee Owners Manual is an invaluable resource, offering comprehensive guidance on maintenance, troubleshooting, and customization. Its clear instructions and detailed sections ensure optimal vehicle performance and safety. Available for free in PDF format, it’s highly rated by users for its clarity and thoroughness. Regular use of this manual is essential for a seamless and enjoyable ownership experience.

10.2 Encouragement for Regular Use

Regular use of the 2012 Jeep Grand Cherokee Owners Manual ensures optimal vehicle performance and safety. It provides invaluable insights for troubleshooting, maintenance, and customization. By referring to the manual, owners can prevent potential issues, enhance their driving experience, and extend the vehicle’s lifespan. Make it a habit to consult the manual before driving to stay informed and confident behind the wheel;

kraft mac and cheese microwave instructions

Kraft Mac and Cheese microwave instructions offer a convenient way to enjoy a classic comfort food. This guide provides easy steps for perfect, quick results every time, ensuring a delicious meal with minimal effort.

Overview of Kraft Mac and Cheese

Kraft Mac and Cheese is a beloved comfort food known for its creamy texture and cheesy flavor. It’s a convenient meal option that combines pasta, cheese sauce, and seasonings. The microwaveable version offers a quick and easy way to prepare it at home. Each serving provides a satisfying, comforting dish that can be ready in minutes. Kraft Mac and Cheese is a popular choice for both kids and adults, offering a delicious, hassle-free meal solution. Its simplicity and taste make it a staple in many households.

Importance of Proper Microwave Cooking

Proper microwave cooking ensures Kraft Mac and Cheese is perfectly cooked, avoiding undercooked pasta or a too-runny sauce. Correctly following instructions prevents overcooking, which can make the pasta mushy and the cheese dry. Using the right water amount and cooking time is crucial for achieving the desired texture. Proper microwave settings also help distribute heat evenly, ensuring the cheese sauce melts uniformly. This attention to detail ensures a creamy, well-balanced dish that’s both satisfying and enjoyable. Taking the time to follow guidelines guarantees a better-tasting meal every time, making the effort worthwhile for a delicious result.

Required Items for Microwave Preparation

A microwave-safe bowl, water, Kraft Mac and Cheese packet, and a spoon for stirring are essential. A microwave cover can help prevent splattering during cooking.

Microwave-Safe Bowl

A microwave-safe bowl is crucial for cooking Kraft Mac and Cheese. Use a 1-quart or 2-quart bowl made of glass or ceramic. Avoid metal, as it can cause sparks. Ensure the bowl is large enough to hold the pasta, water, and cheese sauce without overflowing. A microwave-safe cover or lid can help trap steam and promote even cooking. Never use plastic or Styrofoam, as they may melt or release harmful chemicals when heated. Choosing the right bowl ensures safety and prevents damage to your microwave while cooking your mac and cheese to perfection.

Water Measurement

Accurate water measurement is key to achieving the right consistency in Kraft Mac and Cheese. For two servings, use 1 cup of water, as specified in most instructions. Using too little water may result in undercooked pasta or dry cheese sauce, while excess water can lead to a soupy texture. Ensure the water is added directly to the microwave-safe bowl before cooking. Proper measurement guarantees the pasta cooks evenly and the cheese sauce mixes smoothly. Adjustments may be needed based on microwave power levels or personal preference for creamier results. Precise water measurement ensures a perfectly cooked dish every time.

Microwave Settings

For optimal results, set your microwave to high power when cooking Kraft Mac and Cheese. Cooking times vary depending on serving size and microwave wattage. For two servings, cook on high for 4 to 5 minutes. Larger quantities may require 8 to 13 minutes, ensuring the pasta absorbs water and the cheese sauce thickens. Adjust the cooking time based on your microwave’s power level, as higher wattage microwaves may cook faster. Always check the pasta’s doneness and consistency before serving. If unsure, stir and cook in additional 30-second increments until desired texture is achieved. Proper microwave settings ensure a perfectly cooked dish every time.

Step-by-Step Microwave Cooking Process

Combine pasta and water in a microwave-safe bowl. Cook on high for 4-5 minutes, then stir and check consistency. Add cheese sauce and serve.

Combining Pasta and Water

To start, pour the macaroni from the Kraft Mac and Cheese box into a 1-quart microwave-safe bowl. Add 1 cup of fresh, cold water to the bowl. Ensure the water level covers the pasta evenly. For better taste, a pinch of salt can be added. Stir gently to distribute the pasta and water uniformly. Properly combining the pasta and water ensures even cooking and prevents clumping. Always refer to the package instructions for exact measurements. This step is crucial for achieving the perfect texture in your mac and cheese.

Cooking Time and Power Level

Set your microwave to high power and cook for 3 to 4 minutes. The exact cooking time depends on your microwave’s wattage. After cooking, carefully remove the bowl using oven mitts. Let it stand for 30 seconds to allow steam to distribute evenly. Stir the macaroni gently to ensure even cooking and check for doneness. If undercooked, return to the microwave for an additional 30 seconds. Adjust the cooking time based on personal preference for pasta texture. Always follow the microwave’s guidelines to avoid overheating or burning.

Stirring and Checking Consistency

After microwaving, carefully remove the bowl and stir the macaroni thoroughly to ensure even cooking and sauce distribution. Let it sit for 1-2 minutes to allow the sauce to thicken. Check the consistency by stirring gently; if too thick, add a splash of water; Aim for a creamy texture without excess liquid. Proper stirring ensures the cheese sauce coats the pasta evenly. If the macaroni isn’t fully coated, stir again and let it sit briefly. Avoid over-stirring, as it can disrupt the texture. Adjust as needed for your desired creaminess level.

Tips for Achieving Perfect Texture

Adjust water quantity and monitor cooking time to achieve the ideal texture. Stirring midway ensures even cooking, preventing undercooked or mushy pasta for a smooth, creamy result.

Adjusting Water Quantity

Accurate water measurement is crucial for Kraft Mac and Cheese in the microwave. Too little water can lead to dry pasta, while excess may result in a soupy texture. For two servings, approximately 1 cup of water is recommended. Adjustments can be made based on personal preference for creaminess. Ensure the water level covers the pasta adequately but doesn’t overflow during cooking. Proper water quantity ensures the cheese sauce mixes evenly, creating a smooth and consistent texture. Experimenting with small adjustments helps perfect the desired consistency.

Monitoring Cooking Time

Monitoring cooking time is essential to achieve perfectly cooked Kraft Mac and Cheese in the microwave. Overcooking can lead to a mushy texture, while undercooking results in a firm pasta. Typically, cooking times range from 3 to 5 minutes for single servings and 8 to 10 minutes for larger portions. Check the pasta halfway through the recommended time to ensure it’s not overcooking. If using a lower power microwave, extend the cooking time in short intervals. Proper monitoring ensures the pasta is tender but not overly soft, allowing the cheese sauce to mix smoothly for an ideal texture.

Common Mistakes to Avoid

Overcooking and using insufficient water are common mistakes when microwaving Kraft Mac and Cheese. These errors can lead to dry, mushy, or unevenly cooked pasta, affecting the overall texture and flavor.

Overcooking the Pasta

Overcooking is a common issue when microwaving Kraft Mac and Cheese. It occurs when the pasta is heated beyond the recommended time, leading to a mushy, unappetizing texture. This can happen if the microwave’s power level is too high or if the pasta is left unattended. To prevent this, always follow the suggested cooking time and check the pasta periodically. If the pasta becomes too soft, it can also absorb excess cheese sauce, resulting in a dry, flavorless dish. Proper monitoring ensures a creamy, perfectly cooked macaroni texture every time. Adjust cooking times based on your microwave’s power to avoid overcooking.

Insufficient Water

Insufficient water is a common mistake when microwaving Kraft Mac and Cheese. Using too little water can lead to undercooked pasta, uneven sauce distribution, and a dry, gritty texture. To avoid this, always measure the water accurately according to the package instructions or the specific microwave method you’re following. If the water level is too low, the pasta may not rehydrate properly, resulting in a less-than-desirable consistency. Ensuring the right amount of water is crucial for achieving creamy, well-cooked macaroni. Adjusting the water quantity based on your microwave’s power can also help prevent this issue and ensure a smooth, cheesy finish.

Reheating Kraft Mac and Cheese in the Microwave

Reheating Kraft Mac and Cheese in the microwave is simple. Place portions in a microwave-safe bowl, add a splash of water or milk, cover, and reheat on medium power for about 1 minute, checking until heated through.

Reheating Methods

Reheating Kraft Mac and Cheese in the microwave is straightforward. Place the desired portion in a microwave-safe bowl, add a small amount of water or milk to maintain moisture, and cover lightly. Microwave on medium power for 20-30 seconds, then check consistency. If needed, continue in 10-second increments until heated through. Stir gently to ensure even warming. For frozen mac and cheese, defrost first or reheat directly, adjusting time as needed. This method helps retain creamy texture without overcooking, ensuring a satisfying and warm meal.

Time and Power Adjustments

When reheating Kraft Mac and Cheese in the microwave, adjust cooking time and power based on portion size and personal preference. Start with 20-30 seconds on medium power for small portions, increasing by 10-second intervals for larger amounts. Stir after each interval to ensure even heating and prevent overheating. For frozen mac and cheese, defrost first or extend heating time by 30-45 seconds. Covering the bowl with a microwave-safe lid or plastic wrap helps retain moisture. Adjust power levels to avoid burning, ensuring a creamy and evenly warmed dish every time.

Variations and Add-Ins

Customize Kraft Mac and Cheese by adding cooked bacon, steamed broccoli, or extra cheese for enhanced flavor. These additions elevate the dish to a hearty meal.

Customizing with Additional Ingredients

Enhance your Kraft Mac and Cheese by adding cooked bacon, diced ham, or steamed vegetables like broccoli or peas. For extra creaminess, mix in shredded cheddar or parmesan cheese. Adding a sprinkle of paprika or garlic powder can elevate the flavor. Some users also prefer mixing in cooked ground beef or chicken for added protein. Experiment with spices like cumin or chili powder for a spicy twist. For a gourmet touch, incorporate caramelized onions or a drizzle of truffle oil. These additions transform a simple dish into a personalized, satisfying meal tailored to your taste preferences.

ankylosing spondylitis exercises pdf

Ankylosing spondylitis (AS) is a chronic inflammatory disease primarily affecting the spine, leading to pain, stiffness, and potential fusion of joints. Exercise is a core treatment, recommended by ASAS guidelines to improve flexibility and reduce symptoms.

1.1 Definition and Overview

Ankylosing spondylitis (AS) is a chronic inflammatory disease primarily affecting the spine and sacroiliac joints, leading to pain, stiffness, and potential fusion of vertebrae. It is a type of spondyloarthritis, often associated with the HLA-B27 gene. Symptoms include back pain, limited mobility, and fatigue, with progression potentially causing spinal fusion. Early diagnosis and management are crucial to improve quality of life and slow disease progression. It can also affect other areas, such as the eyes, lungs, and bowel.

1.2 Common Symptoms and Diagnosis

The primary symptoms of ankylosing spondylitis include chronic back pain, stiffness, and limited spinal mobility. Fatigue and inflammation in other joints, such as hips or knees, are also common. Diagnosis often involves clinical evaluation, imaging, and the presence of HLA-B27. The 1984 modified New York criteria are widely used, requiring sacroiliac joint involvement and spinal changes. Early diagnosis is crucial, as untreated AS can progress to significant disability and spinal fusion over time.

The Role of Exercise in Managing Ankylosing Spondylitis

Exercise is a cornerstone in managing AS, improving posture, reducing stiffness, and enhancing mobility. Regular physical activity, tailored to individual needs, helps maintain strength and flexibility, slowing disease progression and improving quality of life.

2.1 Importance of Physical Activity

Physical activity is crucial for managing ankylosing spondylitis, as it helps reduce stiffness, improve posture, and enhance mobility. Regular exercise strengthens muscles, supports spinal alignment, and prevents joint fusion. It also reduces pain and inflammation, improving overall quality of life. Tailored workouts, such as stretching and low-impact aerobics, are essential for maintaining functional ability and slowing disease progression. Consistency in exercise routines is key to achieving long-term benefits and managing symptoms effectively.

2.2 Benefits of Exercise for AS Patients

Exercise significantly reduces pain and stiffness, enhances mobility, and improves posture in AS patients. It strengthens muscles, promotes better spinal alignment, and slows disease progression. Regular physical activity boosts cardiovascular health, reduces fatigue, and enhances overall well-being. Tailored routines, such as swimming and core-strengthening exercises, improve flexibility and balance, helping patients maintain independence and quality of life while managing symptoms effectively and preventing complications.

Stretching Exercises for Ankylosing Spondylitis

Stretching is essential for maintaining flexibility and posture. Gentle exercises, such as neck stretches and hip flexor extensions, help reduce stiffness and improve range of motion.

3.1 Key Stretching Techniques

Key stretching techniques for AS include neck stretches, shoulder rolls, and cat-cow exercises to improve spinal flexibility. Hamstring and hip flexor stretches are also crucial to maintain range of motion. Gentle movements, such as side bends and knee lifts, can reduce stiffness. These exercises should be performed slowly and held for 15-20 seconds to maximize benefits. Regular practice helps alleviate tightness and enhances posture, making daily activities easier and less painful.

3.2 Recommended Frequency and Duration

For optimal results, stretching exercises for AS should be performed daily, ideally in the morning and evening. Each stretch should be held for 15-20 seconds and repeated 2-3 times. Gentle movements and deep breathing can enhance flexibility. A 20-30 minute routine is recommended, incorporating a mix of static and dynamic stretches. Consistency is key to maintaining mobility and reducing stiffness. Always warm up before starting and listen to your body to avoid overexertion.

Swimming and Water-Based Exercises

Swimming is a low-impact, ideal exercise for AS, reducing joint stress while improving mobility. Gentle water movements enhance flexibility without putting pressure on inflamed areas, promoting strength and posture.

4.1 Why Swimming is Ideal for AS

Swimming is an excellent exercise for AS patients due to its low-impact nature, which avoids joint stress. Water-based exercises provide resistance without putting pressure on inflamed areas, improving flexibility and strength. The buoyancy of water supports the spine, reducing discomfort and allowing for a full range of motion. Additionally, swimming enhances posture, promotes muscle engagement, and offers psychological benefits, making it a highly recommended activity for managing AS symptoms effectively.

4.2 Sample Water-Based Routines

Sample water-based routines for AS include gentle marching in the pool, leg swings, and wall push-ups. These exercises improve flexibility and posture without joint strain. Swimming laps using strokes like the breaststroke or backstroke is also beneficial. Water aerobics classes can provide structured routines, while deep-water exercises enhance core strength. These activities are low-impact, reducing inflammation and improving mobility, making them ideal for managing AS symptoms effectively.

Gym Ball Exercises for Core Strength

Gym ball exercises enhance core stability and posture for AS patients. Sitting on a ball for 30 minutes can improve spinal alignment and reduce stiffness. Gentle movements like pelvic tilts and slow trunk rotations strengthen abdominal muscles without strain, aiding spinal mobility and overall stability.

5.1 Using a Gym Ball for Stability

A gym ball is an excellent tool for improving stability in AS patients. Sitting on the ball for 30 minutes can enhance spinal alignment and reduce stiffness. Gentle movements like pelvic tilts and slow trunk rotations strengthen abdominal muscles without strain. These exercises help maintain spinal mobility and overall stability, making daily activities easier and reducing discomfort. Regular use of a gym ball can significantly improve posture and core strength, essential for managing AS effectively.

5.2 Core-Strengthening Exercises

Core-strengthening exercises are vital for AS patients to maintain spinal stability and reduce pain. Plank variations, bird-dog, and Superman exercises target abdominal and back muscles. Gentle movements like pelvic tilts on a gym ball enhance core engagement. These exercises improve posture, balance, and overall spinal mobility. Performing them 2-3 times weekly, with proper form, helps build resilience without overexertion. Consistency in these routines supports long-term management of AS symptoms effectively.

Daily Exercise Routine and Activity Balance

A balanced daily routine combines moderate exercise with rest to manage AS symptoms. Aim for 30-45 minutes of activity, including stretching and strengthening exercises, 3-4 times weekly. Start with short sessions and gradually increase duration. Listen to your body to avoid overexertion, ensuring adequate rest periods to maintain energy levels and joint health. Consistency is key for long-term symptom management.

6.1 Creating a Balanced Exercise Plan

A balanced exercise plan for AS should combine stretching, strengthening, and low-impact activities. Start with a 10-minute warm-up, such as gentle marching or arm circles, to improve mobility. Include core-strengthening exercises using a gym ball to enhance stability. Dedicate 20-30 minutes to flexibility stretches, focusing on the spine, hips, and shoulders. Incorporate rest periods to avoid fatigue and monitor pain levels. Tailor the plan to individual fitness levels and consult a physiotherapist for personalized adjustments. Consistency and gradual progression are key to maintaining joint health and reducing stiffness.

6.2 Incorporating Rest and Monitoring

Rest is crucial to avoid overexertion and joint inflammation. After each exercise session, allow 10-15 minutes of relaxation. Monitor pain levels and stiffness daily, adjusting activities accordingly. Use a journal to track progress, noting improvements or setbacks. If symptoms worsen or persist, consult a physiotherapist or healthcare provider for plan adjustments. Regular monitoring ensures the exercise plan remains safe and effective, promoting long-term joint health and mobility. Balance activity with adequate recovery to prevent fatigue and maintain consistency.

Monitoring Progress and Adjusting the Exercise Plan

Track improvements in flexibility and pain levels regularly. Adjust exercises based on progress and symptom changes. Seek professional guidance if modifications are needed to maintain mobility and symptom control effectively.

7.1 Tracking Improvement and Pain Levels

Regularly monitor progress through exercise logs or journals to assess pain levels and mobility improvements. Note any changes in stiffness or flexibility post-exercise. Adjust routines based on observed benefits or discomfort, ensuring exercises remain effective without exacerbating symptoms. Tracking helps identify patterns and optimal activities, aiding in personalized adjustments for better disease management and overall well-being.

7.2 When to Seek Professional Guidance

Consult a healthcare provider or physiotherapist if exercises worsen symptoms or cause severe pain. Seek guidance if progress plateaus or new symptoms arise, such as joint issues or eye problems. Professional advice is crucial for adjusting routines and ensuring safety, especially if AS affects other body systems. Regular check-ups help tailor exercises to individual needs and prevent complications, promoting long-term management of the condition effectively.

Lifestyle Changes to Support Exercise

A balanced diet, proper hydration, and adequate sleep enhance exercise benefits for AS patients. Stress reduction techniques and avoiding smoking further support overall well-being and activity levels.

8.1 Diet and Nutrition Tips

A balanced diet rich in anti-inflammatory foods like fish, fruits, and whole grains supports AS management. Staying hydrated is crucial, and avoiding triggers like red meat can reduce inflammation. Maintaining a healthy weight prevents additional strain on joints. Incorporating calcium and vitamin D-rich foods promotes bone health. Avoiding processed foods and alcohol can further alleviate symptoms. Consulting a dietitian for personalized plans is recommended, as seen in ankylosing spondylitis exercises pdf guides.

8.2 Sleep and Stress Management

Quality sleep is essential for managing AS, as it aids in reducing inflammation and promoting recovery. Establish a consistent sleep schedule and create a restful environment. Stress management techniques, such as meditation or deep breathing, can help alleviate emotional strain. Engaging in relaxation exercises before bed improves sleep quality. Balancing rest and activity ensures overall well-being, which is vital for managing AS symptoms effectively, as highlighted in ankylosing spondylitis exercises pdf resources.

Regular exercise, balanced with rest, significantly improves symptoms of ankylosing spondylitis. Consistent practice, as outlined in ankylosing spondylitis exercises pdf, enhances mobility and overall well-being.

9.1 Summary of Key Points

Exercise is essential for managing ankylosing spondylitis, improving flexibility and reducing pain. Swimming and gym ball exercises are highly recommended. Regular stretching and core-strengthening routines help maintain mobility. Balancing activity with rest and monitoring progress ensures long-term benefits. Consistency in following a structured exercise plan, such as those detailed in ankylosing spondylitis exercises pdf, is crucial for managing symptoms effectively and improving overall quality of life.

9.2 Encouragement for Consistent Practice

Consistent practice of exercises tailored for ankylosing spondylitis is key to managing symptoms and improving quality of life. Regular routines, such as those outlined in ankylosing spondylitis exercises pdf, help maintain flexibility and reduce pain. Even small daily efforts can lead to significant long-term benefits. Stay motivated by tracking progress and celebrating milestones. Remember, every movement brings you closer to better spinal health and overall well-being.

Additional Resources

Download ankylosing spondylitis exercises pdf guides for detailed routines. Visit www.spondylitis.ca for videos and resources to support your exercise journey with AS.

10.1 Recommended PDF Guides

Download ankylosing spondylitis exercises pdf guides for comprehensive workout plans. Visit www.spondylitis.ca for resources, including the Physio-Self-Referral-Form and detailed exercise routines. These guides offer stretches, core-strengthening exercises, and tips for maintaining flexibility. They are designed to help manage symptoms and improve mobility, ensuring a safe and effective approach to physical activity for AS patients. Regular use of these resources can enhance your exercise program and overall well-being.

10.2 Online Communities and Support

Join online communities like www.spondylitis.ca for shared resources and support. These platforms offer forums, exercise tips, and personal stories from AS patients; They provide access to ankylosing spondylitis exercises pdf guides, video demonstrations, and expert advice. Connecting with others facing similar challenges can inspire and motivate you to stay consistent with your exercise routine and overall management of AS.

f01 fire guard study guide

Welcome to the F01 Fire Guard Study Guide, your essential resource for mastering fire safety protocols and preparing for the certification exam. This guide covers critical topics such as fire prevention, emergency response, and inspection duties, ensuring you are well-equipped to handle impaired fire systems and maintain safety in various settings.

Overview of the F01 Fire Guard Certification

The F01 Fire Guard Certification is essential for individuals responsible for fire safety in buildings with impaired fire protection systems. It ensures they can effectively monitor environments, conduct inspections, and respond to emergencies. The certification validates knowledge of fire prevention, evacuation procedures, and compliance with safety regulations, making it a critical requirement for maintaining public safety in high-risk scenarios.

Importance of the F01 Fire Guard Exam

The F01 Fire Guard Exam is crucial for ensuring individuals can handle fire safety responsibilities effectively. It validates their ability to monitor impaired systems, conduct inspections, and respond to emergencies. Passing the exam demonstrates competence in protecting life and property, making it a vital step for those seeking to fulfill this critical role in maintaining public safety and compliance with fire safety regulations.

Roles and Responsibilities of a Fire Guard

A Fire Guard ensures safety in impaired fire systems by conducting regular inspections, monitoring for hazards, and responding to emergencies. Their role is critical in maintaining fire safety protocols and protecting occupants and property during system impairments.

Understanding Fire Safety in Impaired Systems

Understanding fire safety in impaired systems is crucial for Fire Guards, as it involves managing risks when fire protection systems like sprinklers or alarms are offline. Impaired systems require heightened vigilance, as they reduce the ability to detect or suppress fires. Fire Guards must identify potential hazards, ensure compliance with safety protocols, and be prepared to respond effectively. This knowledge is key to preventing incidents and safeguarding occupants in compromised environments.

Duties During Fire Watches and Inspections

Duties during fire watches and inspections are central to a Fire Guard’s role. They must patrol areas with impaired systems, monitor for fire hazards, and ensure safety measures are in place. Inspections involve checking fire extinguishers, exit routes, and alarm systems. Fire Guards must document findings and report any issues promptly. Their vigilance ensures compliance with regulations and minimizes risks, making these duties critical for maintaining safety and preventing potential disasters.

Study Materials for the F01 Fire Guard Exam

The F01 Fire Guard study materials include a comprehensive guide, practice tests, and online resources. These tools cover key topics like fire prevention and evacuation procedures, ensuring thorough preparation for the exam. They are essential for understanding safety regulations and duties, helping candidates achieve certification and effectively perform their roles.

Key Topics Covered in the Study Guide

The F01 Fire Guard Study Guide covers essential topics such as fire prevention, evacuation procedures, and emergency response. It also includes details on impaired fire systems, fire extinguisher use, and compliance with safety regulations. Additionally, the guide addresses the roles and responsibilities of fire guards, inspection protocols, and communication strategies during emergencies. These topics are critical for ensuring a comprehensive understanding of fire safety and effective performance in real-world scenarios.

Supplemental Resources for Effective Preparation

Beyond the study guide, utilize online training programs and practice tests to reinforce your understanding. Community forums and professional networks offer valuable insights and real-world advice. Additionally, FDNY resources and fire safety workshops provide hands-on experience. These tools complement the study guide, ensuring a well-rounded preparation for the F01 Fire Guard exam and enhancing your ability to apply knowledge in practical scenarios effectively.

Preparing for the F01 Fire Guard Exam

Understand the exam format and content, focusing on key topics like fire safety and emergency procedures. Utilize the study guide and practice tests to build confidence and readiness.

Understanding the Exam Format and Content

The F01 Fire Guard exam evaluates your knowledge of fire safety protocols, impaired systems, and emergency procedures. The test includes multiple-choice questions covering fire prevention, evacuation methods, and equipment use. Familiarize yourself with the format to manage time effectively. Focus on understanding fire codes, inspection duties, and real-world application scenarios to ensure readiness.

Tips for Success on the F01 Fire Guard Exam

To excel on the F01 Fire Guard exam, thoroughly review the study guide and practice with sample questions. Focus on understanding fire codes, safety protocols, and emergency procedures. Prioritize mastering key topics like impaired systems and evacuation methods. Utilize online resources and training programs to reinforce learning. Regular practice tests will help identify weaknesses and build confidence. Stay calm during the exam and manage your time effectively to ensure success.

Key Topics to Master for the F01 Exam

Mastering fire prevention, safety measures, evacuation procedures, and emergency response is crucial. Understanding impaired systems and regulatory compliance ensures comprehensive preparation for the F01 Fire Guard exam.

Fire Prevention and Safety Measures

Fire prevention and safety measures are cornerstone topics in the F01 Fire Guard Study Guide. Understanding how to identify fire hazards, implement preventive strategies, and ensure compliance with safety regulations is vital. This section covers the proper use of fire extinguishers, alarm systems, and emergency exit protocols. Additionally, it emphasizes the importance of conducting regular inspections to maintain fire safety standards, especially in buildings with impaired systems. Mastering these concepts ensures effective fire watch operations and emergency preparedness.

Evacuation Procedures and Emergency Response

Evacuation procedures and emergency response are critical components of the F01 Fire Guard Study Guide. Fire guards must master evacuation routes, alarm systems, and emergency communication protocols to ensure safe and orderly exits during fires. This section emphasizes coordinating with occupants, understanding exit signage, and executing emergency plans efficiently. Proper training in evacuation strategies minimizes risks and ensures compliance with fire safety regulations, preparing fire guards to respond effectively in high-stress situations.

Practical Tips for Fire Guards

Conduct regular inspections, stay alert during fire watches, and maintain clear communication. Familiarize yourself with evacuation routes and ensure all safety equipment is functional and accessible.

Conducting Regular Inspections and Monitoring

Regular inspections are vital for ensuring fire safety in impaired systems. Fire guards must systematically check fire extinguishers, alarm systems, and emergency exits. Monitoring includes observing for potential fire hazards, such as electrical malfunctions or flammable materials. Guards should document findings and report issues promptly. Maintaining a log of inspections helps track compliance and address risks proactively. Consistent vigilance is key to preventing fires and ensuring a safe environment during system impairments.

Effective Communication During Emergencies

Effective communication is critical during emergencies to ensure safety and coordination. Fire guards must clearly alert occupants, provide instructions, and relay information to emergency services. Remaining calm and concise helps prevent panic. Guards should use designated communication tools and protocols to maintain order. Proper communication ensures timely evacuations and efficient response efforts, safeguarding lives and property during fire incidents or system impairments.

Maintaining Certification and Compliance

Maintaining F01 certification requires periodic renewal and adherence to fire safety regulations. Fire guards must complete continuing education and stay updated on regulatory changes to ensure compliance. Regular training and inspections help uphold certification standards, ensuring fire guards remain proficient in safeguarding lives and property effectively. Compliance with local fire codes and certification renewal deadlines is essential for ongoing validity and professional competence in fire safety roles.

Renewal Requirements for Fire Guard Certification

To maintain F01 certification, fire guards must complete periodic renewal processes, typically every 3 years, ensuring ongoing competence in fire safety protocols. Renewal involves continuing education and staying updated on regulatory changes. Fire guards must adhere to local fire codes and complete required training courses to uphold certification standards. Regular inspections and compliance checks are essential to ensure fire safety knowledge remains current and effective in real-world scenarios. Professional networks and training programs can provide additional support for renewal and continuous improvement.

Staying Updated on Fire Safety Regulations

Fire guards must stay informed about evolving fire safety regulations to ensure compliance and effectiveness. Regular updates from local fire departments, online training platforms, and professional networks provide essential insights. Subscribing to newsletters and participating in workshops helps maintain current knowledge. Fire safety regulations often change, so continuous learning is crucial to adapt to new standards and technologies, ensuring the safety of occupants and compliance with legal requirements in impaired fire systems. Community support and resources further enhance understanding and practical application.

Case Studies and Real-World Applications

The F01 Fire Guard Study Guide includes real-world scenarios, such as fire watches in impaired systems and emergency evacuations, highlighting practical applications of fire safety knowledge. These case studies demonstrate how effective monitoring and quick decision-making can prevent incidents and save lives, providing invaluable insights for fire guards in real-life situations. Lessons learned from these examples emphasize the importance of preparation and adherence to safety protocols. Practical applications reinforce theoretical concepts, ensuring fire guards are ready to act decisively during emergencies. These scenarios also illustrate the critical role of fire guards in maintaining safety and compliance, offering a comprehensive understanding of their responsibilities. By studying these cases, fire guards can better anticipate challenges and respond appropriately, ensuring the safety of occupants and property in various settings. The guide’s focus on real-world applications makes it an indispensable tool for both new and experienced fire guards seeking to enhance their skills and stay updated on best practices in fire safety.

Lessons Learned from Fire Guard Scenarios

Real-world fire guard scenarios highlight the importance of quick decision-making and effective communication. For instance, a fire in a high-rise building during a system impairment showcased how a fire guard’s prompt evacuation order saved lives. Another case revealed that regular inspections can uncover hidden fire hazards, preventing potential disasters. These lessons emphasize the need for proactive monitoring, clear emergency protocols, and adherence to safety regulations. Such scenarios underscore the critical role of fire guards in maintaining safety and preparedness, reinforcing the practical knowledge covered in the F01 study guide.

Applying F01 Knowledge in Real-Life Situations

Fire guards equipped with F01 knowledge can effectively manage real-life emergencies, such as impaired fire systems or active fires. They apply skills like identifying hazards, using fire extinguishers, and coordinating evacuations. For example, during a system impairment, a fire guard might conduct regular patrols, ensuring safety until systems are restored. This practical application of F01 training ensures proactive responses, saving lives and property in critical situations.

Additional Resources and Support

Supplement your F01 study with online platforms, training programs, and professional networks. These resources offer practice tests, expert tips, and community support to enhance your fire guard skills.

Online Platforms and Training Programs

Enhance your F01 preparation with online platforms offering practice tests, video tutorials, and interactive modules. Websites like Star Security Training provide expert-led courses and simulations to master fire safety protocols; Utilize forums and Q&A sessions to clarify doubts and gain insights from experienced professionals. These resources ensure comprehensive understanding of key topics, helping you excel in the exam and perform effectively as a fire guard.

Community and Professional Networks for Fire Guards

Engaging with community and professional networks enhances your fire guard journey. Join forums, groups, and associations to connect with experienced fire safety professionals. These networks offer support, share best practices, and provide updates on regulations. Participate in seminars and workshops to stay informed. Collaborating with peers and experts fosters growth and ensures you remain updated on the latest techniques and compliance requirements, vital for effective fire guard responsibilities.

The F01 Fire Guard Study Guide equips you with essential knowledge to excel in fire safety roles. Mastery of its content ensures confidence and competence in protecting life and property.

Final Tips for Achieving Success as a Fire Guard

To excel as a fire guard, stay vigilant during inspections, ensure clear communication in emergencies, and continuously update your knowledge of fire safety regulations. Regularly practice scenarios, maintain organized records, and seek feedback to improve. Confidence and preparedness are key to protecting lives and property effectively. Stay proactive, follow protocols strictly, and embrace lifelong learning to master your role.