singer 5400 sewing machine manual

Welcome to the Singer 5400 Sewing Machine Manual, your comprehensive guide to unlocking the full potential of this versatile sewing machine․ Designed for both beginners and experienced sewists, this manual provides detailed instructions, safety tips, and troubleshooting solutions to ensure seamless operation․

Key Features and Specifications of the Singer 5400

The Singer 5400 sewing machine is a versatile and user-friendly model designed for a wide range of sewing projects․ It features a variety of built-in stitches, including basic, decorative, and stretch stitches, making it suitable for sewing fabrics like cotton, polyester, and knits․ The machine is equipped with an automatic needle threader, a top drop-in bobbin, and a free-arm design for easy access to hard-to-reach areas like sleeves and pant hems․

  • 110 built-in stitches, including 6 automatic buttonhole styles․
  • Maximum sewing speed of 800 stitches per minute for efficient sewing․
  • Adjustable stitch length and width for customizable results․
  • LED lighting for improved visibility of the work area․
  • Heavy-duty metal frame for durability and stability․
  • Compatible with a variety of presser feet for specialized tasks․

The Singer 5400 also offers a user-friendly interface with a digital display, allowing easy stitch selection and adjustment․ Its portability and lightweight design make it ideal for sewists who need to move their machine between spaces․ Whether you’re a beginner or an experienced sewer, the Singer 5400 provides the tools and flexibility to tackle various projects with precision and ease․

Safety Precautions and Guidelines

Ensuring safe operation is crucial when using the Singer 5400 sewing machine․ Always read the manual thoroughly before starting your first project․ Keep children and pets away from the machine while it is in use․ Avoid sewing over fingers or loose clothing that could get caught in the needle or moving parts․

  • Use only attachments and accessories recommended by the manufacturer to prevent damage or accidents․
  • Never touch the needle or presser foot with your fingers, as they may cause injury․
  • Keep the work area clean and well-lit to avoid tripping hazards or poor visibility․
  • Unplug the machine when not in use, during maintenance, or when changing accessories․
  • Avoid sewing near flammable materials, as the machine may produce heat or sparks․
  • Use the correct needle type for your fabric to prevent breakage or damage to the machine․

Regularly inspect the machine for worn or damaged parts and ensure all screws and components are tightly secured․ Follow the manufacturer’s guidelines for maintenance and repairs․ By adhering to these safety precautions, you can enjoy a safe and efficient sewing experience with the Singer 5400․

Setting Up and Basic Operation of the Singer 5400

Begin by unpacking and placing the machine on a stable surface․ Plug in the power cord and familiarize yourself with the controls․ Thread the machine as per the manual, then select your desired stitch․ Start with a test fabric to ensure proper operation․

4․1․ Unpacking and Initial Setup

Start by carefully unpacking the Singer 5400 sewing machine from its box․ Ensure all accessories, such as the power cord, needles, and instruction manual, are included․ Place the machine on a stable, flat surface, away from direct sunlight and moisture․ Plug in the power cord, ensuring it is securely connected to both the machine and a nearby electrical outlet․ Before turning it on, inspect the machine for any visible damage or debris from shipping․ If everything appears in order, proceed to power it on and perform a quick test run using scrap fabric to ensure proper function․ For a smooth setup, refer to the manual for guidance on identifying and understanding the machine’s parts․ Keep the area clean and well-lit to facilitate easy operation․ This initial setup process ensures your Singer 5400 is ready for sewing projects right out of the box․

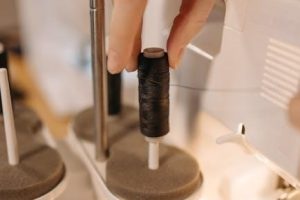
4․2․ Understanding the Machine Parts

Familiarizing yourself with the Singer 5400 sewing machine’s components is essential for efficient operation․ The machine features a user-friendly design with clearly labeled parts․ The spool pins hold the thread, while the tension dials adjust the thread tightness․ The stitch selector allows you to choose from various stitch patterns, and the presser foot lever raises and lowers the presser foot for fabric handling․ The handwheel enables manual control for precise stitching, and the reverse stitch button reinforces seams․ The needle bar and bobbin case are crucial for maintaining proper thread flow․ Locate the power switch and light switch for easy access․ Understanding these parts ensures smooth operation and helps you troubleshoot common issues․ Refer to the manual’s diagrams for a visual guide to all components and their functions․

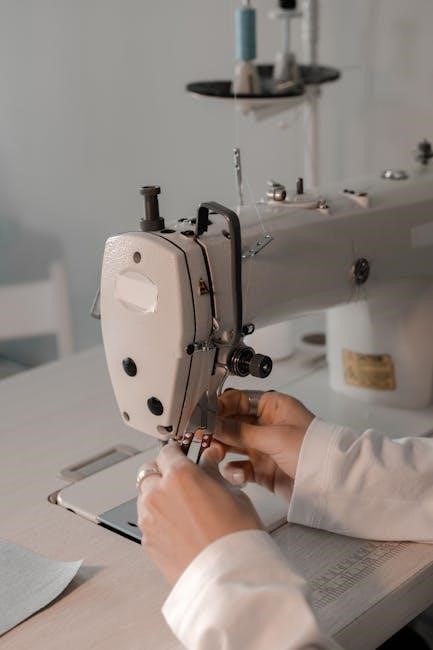
4․3․ Threading the Machine

Proper threading is crucial for smooth operation of the Singer 5400 sewing machine․ Begin by turning off the machine and ensuring the presser foot is raised․ Locate the spool pin and draw the thread through the thread guide, looping it around the tension discs․ Pass the thread through the take-up lever and then insert it into the needle bar from front to back․ Leave a small loop at the end and pull gently to seat the thread․ Next, load the bobbin with the desired thread, ensuring it is evenly wound․ Insert the bobbin into the bobbin case, making sure the thread passes through the bobbin case slot․ Pull the thread gently to set the bobbin tension․ Always use high-quality thread and follow the manual’s guidelines for proper threading to avoid issues like uneven stitches or thread breakage․ Refer to the manual’s diagrams for a clear visual guide to threading correctly․

4․4․ Tension Adjustment

Proper tension adjustment is essential for achieving balanced stitches on the Singer 5400 sewing machine․ Start by ensuring the machine is turned off and the presser foot is raised․ To adjust the upper thread tension, locate the tension discs and gently turn the tension dial clockwise or counterclockwise․ Test the tension by pulling the thread; it should feel smooth but not too tight or loose․ For the bobbin tension, remove the bobbin case and adjust the small screw on the case using a screwdriver․ Turn the screw clockwise to tighten or counterclockwise to loosen․ Reinsert the bobbin and pull the thread to check the tension․ If the stitches are uneven, repeat the process until the tension is balanced․ Always use the test stitch function to verify the adjustments․ Keep in mind that incorrect tension can lead to poor stitch quality or thread breakage․ Refer to the manual for specific guidelines and diagrams to ensure accurate adjustments․ Proper tension adjustment ensures professional-looking results for all your sewing projects․

Troubleshooting Common Issues

Troubleshooting common issues with the Singer 5400 sewing machine is straightforward when you follow the steps outlined in this section․ One of the most frequent problems is the machine not turning on, which can often be resolved by checking the power cord connection or ensuring the outlet is working․ If the fabric does not move, verify that the presser foot is lowered and the feed dogs are properly engaged․ Thread jams can occur due to improper threading or using low-quality thread․ To resolve this, carefully remove the bobbin, rethread the machine, and ensure the tension is balanced․ Additionally, if the stitch quality is poor, check for dull or incorrect needle sizes and ensure the fabric is aligned correctly․ For uneven tension, refer to the tension adjustment guidelines in the manual․ Always use Singer-branded needles and recommended attachments to avoid compatibility issues․ Regular maintenance, such as cleaning the machine and lubricating moving parts, can prevent many common problems․ By addressing these issues systematically, you can ensure smooth operation and professional results․

Maintenance and Care Tips

Regular maintenance is essential to ensure the Singer 5400 sewing machine operates smoothly and lasts for years․ Start by turning off and unplugging the machine before cleaning․ Use a soft brush or compressed air to remove lint and debris from the bobbin area, feed dogs, and tension discs․ Oiling the machine periodically is crucial; apply a few drops of sewing machine oil to the moving parts as specified in the manual․ Avoid over-oiling to prevent attracting dust and dirt․ Clean the exterior with a damp cloth, but never use harsh chemicals or abrasive cleaners․ Store the machine in a dry, cool place away from direct sunlight to protect the electronic components․ Replace the needle after every 8 hours of use or when it becomes dull to maintain stitch quality․ Always use Singer-branded needles and parts to ensure compatibility and performance․ By following these care tips, you can keep your Singer 5400 in optimal condition and enjoy consistent sewing results․ Regular maintenance not only extends the machine’s lifespan but also enhances your sewing experience․

Advanced Features and Stitch Options

The Singer 5400 sewing machine boasts an impressive array of advanced features and stitch options, making it a versatile tool for sewists of all levels․ With over 100 built-in stitches, including basic, decorative, and stretch stitches, this machine allows for a wide range of creative possibilities․ Users can choose from various programmable stitch options, enabling customization to suit specific sewing projects․ The machine also features automatic threading and tension adjustment, streamlining the sewing process․ Advanced utilities like a one-step buttonhole function and multiple presser feet options further enhance its functionality․ Whether tackling delicate fabrics, heavy-duty materials, or intricate embroidery, the Singer 5400’s advanced features ensure precision and professional results․ Its intuitive interface and customizable settings make it easy to explore complex stitching techniques, catering to both beginners and experienced sewists․ This machine truly stands out for its ability to adapt to diverse sewing needs, offering endless opportunities for creativity and innovation․

alien rpg pdf

The Alien RPG PDF offers an immersive tabletop experience set in the iconic Alien universe, blending cinematic storytelling with deep RPG mechanics. Players navigate a tense, survival-focused narrative, making tough decisions that impact the story. The game’s popularity stems from its faithful adaptation of the franchise’s atmosphere and its innovative gameplay system. Perfect for fans of sci-fi and horror, it delivers thrilling adventures that capture the essence of the Alien saga.

1.1 Overview of the Alien RPG

The Alien RPG is a tabletop roleplaying game set in the year 2183, offering cinematic and campaign play modes. It uses a d6 dice pool system, emphasizing tension and survival. Players create characters with unique backgrounds and agendas, navigating a deadly universe filled with iconic locations and terrifying alien species, staying true to the franchise’s atmosphere and lore.

1.2 Background and Setting of the Game

The Alien RPG is set in the year 2183, a future where humanity has colonized the stars but remains vulnerable to deadly threats. The game unfolds in a grim, horror-tinged universe filled with derelict spaceships, isolated colonies, and corporate intrigue. Drawing inspiration from the Alien franchise, it captures the eerie atmosphere and survivalist tone fans know and love.

1.3 Why the Alien RPG PDF is Popular

The Alien RPG PDF is popular for its faithful adaptation of the Alien franchise, offering cinematic gameplay and deep campaign modes. Its accessible d6 dice pool system and emphasis on storytelling attract both veterans and newcomers. The PDF format makes it convenient for players worldwide, enhancing its global appeal and fostering a vibrant community of fans and creators.

Core Rulebook Features

The Alien RPG Core Rulebook is a 392-page, full-color hardcover, offering a comprehensive ruleset for cinematic and campaign play. Set in 2183, it captures the Alien universe’s eerie atmosphere, blending fast-paced gameplay with rich storytelling, perfect for fans seeking immersive sci-fi horror experiences.

2.1 The 392-Page Full-Color Hardcover Book

The Alien RPG Core Rulebook is a stunning 392-page, full-color hardcover book, featuring vibrant illustrations and detailed artwork that immerse players in the eerie atmosphere of the Alien universe. Its high-quality design and comprehensive content make it a must-have for fans, offering a visually rich and engaging tabletop roleplaying experience.

2.2 Year 2183 Setting and Ruleset

The Alien RPG is set in the year 2183, offering a futuristic universe filled with danger and mystery. The ruleset is specifically designed to enhance the Alien experience, with a focus on survival and tension. The game seamlessly integrates cinematic storytelling with deep roleplaying elements, providing players with a versatile system to explore the horrors of space.

2.3 Cinematic and Campaign Play Modes

The Alien RPG features two distinct play modes: Cinematic and Campaign. Cinematic mode offers fast-paced, high-stakes scenarios, perfect for immediate thrills and action. Campaign mode allows for extended storytelling, deep character development, and exploration of the Alien universe. Both modes provide unique experiences, catering to players seeking either intense, movie-like adventures or immersive, long-term narratives.

Game Mechanics and System

The Alien RPG utilizes a d6 dice pool system, where players roll dice to determine success or failure. Stress dice add tension, influencing character behavior and outcomes, creating a dynamic and immersive experience.

3.1 The d6 Dice Pool System

The Alien RPG employs a d6 dice pool system, combining attribute and skill bonuses to determine the number of dice rolled. Success requires at least one die showing a 6, while stress dice introduce complications, enhancing the game’s tension and unpredictability. This system ensures a balance between strategy and cinematic storytelling, keeping players engaged and invested in their characters’ fates.

3.2 Stress Dice and Their Impact on Gameplay

Stress dice in the Alien RPG add layers of tension and unpredictability. Rolled alongside attribute dice, they introduce narrative complications or challenges, even when actions succeed. High stress levels can lead to panic or critical injuries, heightening the game’s survival horror elements and forcing players to make tough decisions that impact the story’s outcome and their characters’ survival.

3.4 Success and Failure Mechanisms

Success in the Alien RPG is determined by rolling a 6 on a dice pool, while lower results introduce complications. Failures escalate tension, leading to critical injuries or narrative setbacks. This system emphasizes survival horror, where even partial successes can have dire consequences, keeping players on edge and immersed in the game’s high-stakes environment.

Character Creation and Development

Character creation in the Alien RPG allows for deep customization, with attributes, skills, and personal agendas shaping unique roles. A form-fillable PDF sheet aids organization, enhancing immersive gameplay.

4.1 Attributes and Skills System

The Alien RPG employs a d6 dice pool system, where attributes and skills determine the number of dice rolled. A roll of 6 indicates success, while stress dice introduce complications. This system balances simplicity with depth, allowing players to craft unique characters tailored to their preferred playstyle. It emphasizes storytelling and strategic decision-making, enhancing the game’s tension and replayability.

4.2 Character Backgrounds and Personal Agendas

Character backgrounds and personal agendas in the Alien RPG add depth and motivation to players, influencing their decisions and interactions. These elements create tension and cooperation, as characters may prioritize personal goals over group objectives. This system enhances storytelling by making each character unique and integral to the narrative, ensuring a dynamic and immersive experience.

4.3 Character Sheet Customization

The Alien RPG PDF allows players to customize their character sheets, tailoring attributes, skills, and gear to fit unique roles. Fans have created form-fillable PDFs, enhancing organization and personalization. This feature ensures each character is distinct, streamlining gameplay and immersing players in the Alien universe with precision and creativity.

Campaigns and Scenarios

The Alien RPG PDF features a variety of thrilling scenarios, blending horror and sci-fi elements. Players can explore eerie space stations, abandoned mines, and other tense environments, creating unforgettable stories and challenges that test survival and teamwork.

5.1 Cinematic vs. Campaign Play

Cinematic play offers fast-paced, movie-like experiences, focusing on intense, high-stakes scenarios. Campaign play provides deeper storytelling, allowing players to develop characters and explore the Alien universe over multiple sessions. Both modes ensure thrilling adventures, whether you prefer quick, dramatic stories or extended, immersive journeys through the franchise’s terrifying world.

5.2 Example Scenarios and Adventures

Scenarios like escaping a derelict spacecraft or investigating mysterious signals immerse players in the Alien universe. Campaigns such as “Sevastopol Station” involve battling an alien creature threatening lives, while “Mine Exploration” delves into eerie environments. These adventures blend horror and sci-fi, offering thrilling narratives that challenge survival instincts and strategic thinking.

5.3 Homebrew Campaign Ideas

Homebrew campaigns empower players to craft unique stories within the Alien universe, such as exploring derelict spaceships or battling alien infestations. These custom scenarios expand the lore, offering fresh challenges and immersive experiences that capture the essence of the franchise’s suspense and horror, allowing for endless creativity and thrilling adventures.

The Alien Universe and Lore

The Alien RPG PDF dives into the rich backstory of the franchise, featuring iconic locations like LV-426 and derelict spacecraft. It expands the lore, introducing new alien species and deepening the mystery of the universe, providing players with a immersive setting that honors the original films while offering fresh discoveries.

6.1 The Alien Franchise and Its Influence

The Alien RPG PDF draws heavily from the iconic franchise, capturing the essence of survival horror and sci-fi. It adapts the films’ tense atmosphere, mysterious lore, and terrifying creatures into tabletop gameplay, offering players a faithful adaptation that honors the source material while expanding the universe with new stories and mechanics.

6.2 Key Locations and Vehicles in the Game

The Alien RPG PDF features iconic locations like derelict spaceships, colonial outposts, and industrial stations, immersing players in the franchise’s eerie atmosphere. Vehicles such as the Nostromo and escape shuttles play crucial roles in gameplay, serving as both settings for tension and tools for survival, enhancing the sci-fi horror experience with authentic details from the Alien universe.

6.3 Alien Species and Their Role in the Game

The Alien RPG PDF introduces a variety of terrifying species, with the Xenomorph at the core, driving fear and tension. Facehuggers, Chestbursters, and other variants create unique challenges, while synthetic beings like androids add layers of mistrust. These creatures and characters shape the narrative, forcing players to confront deadly threats and moral dilemmas, enhancing the game’s immersive horror experience.

Resources and Community Support

The Alien RPG PDF is backed by official supplements, community-created content, and active online forums, fostering a vibrant community and extensive support for players worldwide.

7.1 Official Supplements and Expansions

Official supplements for the Alien RPG expand gameplay with new adventures, rules, and lore. These expansions, available in PDF and print, enhance the core experience, offering fresh scenarios and deepening the game’s universe. Players and GMs benefit from additional resources, ensuring endless opportunities for storytelling and character development within the Alien setting.

7.2 Community-Created Content and Mods

The Alien RPG community thrives with fan-made content, including custom scenarios, rules, and character sheets. Players and GMs share innovative mods, expanding the game’s possibilities. These creations, often available as free PDFs, enrich the RPG experience, fostering creativity and offering fresh perspectives on the Alien universe for both new and veteran players.

7.3 Online Communities and Forums

Active online communities and forums dedicated to the Alien RPG foster collaboration and creativity. Fans share tips, mods, and custom content, while discussing strategies and experiences. Platforms like Reddit, Discord, and Facebook host vibrant discussions, enabling players to connect, exchange ideas, and enhance their gameplay. These spaces are vital for both newcomers and seasoned players seeking inspiration and resources.

The Alien RPG PDF delivers a faithful adaptation of the iconic franchise, offering immersive gameplay and cinematic experiences. Its future looks bright with expanding content and dedicated fans.

8.1 Final Thoughts on the Alien RPG PDF

The Alien RPG PDF excels at capturing the franchise’s eerie atmosphere and tension. Its blend of cinematic and campaign play modes offers versatile storytelling. With a simple yet effective d6 dice system, it ensures thrilling gameplay. The dedicated community and customizable options further enhance its appeal, making it a must-play for both fans and newcomers alike.

8.2 Future Prospects for the Game

The Alien RPG PDF’s future looks promising, with growing community support and potential expansions. Official supplements and fan-created content are expected to expand the game’s universe, offering new scenarios and mechanics. Its adaptable system and loyal fanbase ensure continued relevance, making it a staple in tabletop gaming for years to come.

instructions for cuisinart ice cream maker

The Cuisinart Ice Cream Maker simplifies homemade ice cream creation‚ offering a must-have appliance for ice cream enthusiasts․ It allows users to craft customizable‚ delicious flavors effortlessly‚ making it a perfect tool for both beginners and experienced makers․

Overview of the Cuisinart Ice Cream Maker

The Cuisinart Ice Cream Maker is a popular kitchen appliance designed to simplify the process of making homemade ice cream․ It features a pre-freezer bowl that eliminates the need for ice‚ automatic churning‚ and a user-friendly design․ The machine is ideal for both novices and experienced ice cream enthusiasts‚ offering a quick and efficient way to create customizable flavors․ By following the instructions‚ users can achieve professional-quality results with minimal effort․ Its compact design and easy operation make it a versatile addition to any home kitchen‚ perfect for crafting delicious treats year-round․

Key Features and Benefits

The Cuisinart Ice Cream Maker boasts a range of key features that make it a standout appliance․ Its automatic churning function ensures consistent results‚ while the pre-freezer bowl eliminates the need for ice‚ saving time and effort․ The machine’s compact design and easy-to-use interface make it accessible for all skill levels․ Additionally‚ the included mixing paddle and recipe booklet provide endless customization options․ These features combined offer a convenient‚ efficient‚ and enjoyable way to create high-quality ice cream at home‚ making it a valuable addition to any kitchen․

Importance of Following Instructions

Adhering to the Cuisinart Ice Cream Maker’s instructions ensures optimal performance‚ safety‚ and desired results․ Proper preparation‚ such as pre-freezing the bowl and chilling the mixture‚ is crucial for achieving the perfect consistency․ Deviating from guidelines can lead to issues like runny ice cream or machine malfunction․ Following steps like assembly‚ pouring‚ and monitoring churning time guarantees smooth operation․ Ignoring safety precautions‚ such as avoiding heat exposure or improper cleaning‚ may damage the appliance or pose risks․ By adhering to instructions‚ users can enjoy consistent‚ high-quality ice cream while maintaining the longevity of their machine․

Preparation Steps Before Churning

Freezing the bowl for 16-24 hours‚ chilling the mixture‚ and assembling the machine are essential steps to ensure proper operation and achieve the desired ice cream consistency․

Freezing the Bowl

Freezing the bowl is a crucial first step․ Place the bowl in the freezer for 16 to 24 hours to ensure it’s completely frozen․ Shake the bowl gently; if no liquid sound is heard‚ it’s ready․ This step ensures proper churning and prevents ice crystals from forming․ Always store the bowl in the freezer after use to maintain its readiness for future batches․ Proper freezing is essential for achieving smooth‚ creamy ice cream texture․ Consistency starts with a well-frozen bowl‚ so plan ahead to freeze it overnight or throughout the day․

Chilling the Mixture

Chilling the mixture is essential for optimal consistency․ Refrigerate your ice cream base for at least 2 hours or overnight to ensure all ingredients are thoroughly cold․ This step prevents ice crystals from forming during churning‚ resulting in a smoother texture․ Make sure the mixture is chilled before pouring it into the frozen bowl․ Proper chilling also helps the machine work efficiently‚ ensuring the best results․ For ideal performance‚ keep the mixture cold but not frozen․ A well-chilled mixture guarantees a creamy and even finish to your homemade ice cream․

Assembling the Machine

Assembling the Cuisinart Ice Cream Maker is straightforward․ First‚ ensure all components are washed and dried․ Place the chilled freezer bowl onto the base‚ aligning it properly․ Secure the bowl with the locking ring to maintain stability․ Next‚ attach the mixing paddle to the top of the bowl․ Finally‚ place the transparent lid on top to prevent splashing․ Double-check that all parts are securely fitted to ensure smooth operation․ Proper assembly is crucial for efficient churning and to avoid any leaks or issues during the process․ Follow the manufacturer’s guidelines for correct alignment and fitting of each part․

The Churning Process

Turn on the machine‚ pour the chilled mixture into the freezer bowl‚ and let it churn for 15-20 minutes․ The paddle will mix and aerate the mixture‚ transforming it into a smooth‚ creamy texture․ Avoid over-churning‚ as it can lead to an icy consistency․ Once the desired consistency is reached‚ stop the machine and transfer the ice cream to an airtight container for freezing․

Pouring the Mixture into the Maker

Ensure the freezer bowl is fully frozen‚ typically 16 to 24 hours in advance․ Chill your ice cream mixture for at least 2 hours to achieve the optimal temperature․ Before pouring‚ confirm that the bowl is properly aligned with the machine’s base and the mixing paddle is securely in place․ Carefully pour the mixture into the bowl‚ avoiding overfilling to allow for expansion during churning․ Gently close the lid to prevent spills and ensure even mixing․ Start the machine and let it churn for the recommended 15 to 20 minutes‚ or until your desired consistency is reached․ After churning‚ promptly transfer the ice cream to an airtight container to prevent ice crystals from forming․ Keep the area clean and the machine on a stable surface to avoid any vibrations during the process․ For thicker mixtures‚ like custard bases‚ pour smoothly to prevent splashing․ Having a ready airtight container ensures your ice cream stays fresh and creamy․

Operating the Machine

Plug in the Cuisinart Ice Cream Maker and ensure it is placed on a stable‚ even surface․ Turn the machine on using the power switch‚ typically located on the base․ The mixing paddle will begin to rotate slowly‚ incorporating air and breaking down ice crystals for a smoother texture․ Allow the machine to run for the recommended 15 to 20 minutes‚ or until the desired consistency is achieved․ You may hear a slight grinding noise as the mixture thickens․ Keep the area around the machine clear to avoid distractions․ For thicker mixtures‚ the machine may slow down slightly‚ but it will continue churning effectively․ Once the cycle is complete‚ turn off the machine and carefully remove the lid to inspect your freshly made ice cream․

Monitoring the Churning Time

Monitor the churning process to ensure optimal results․ Most Cuisinart models require 15 to 20 minutes of churning․ As the mixture thickens‚ the machine may slow slightly․ Listen for a change in pitch‚ indicating the ice cream is ready․ Avoid over-churning‚ as it can make the texture too hard․ Stop the machine once the desired consistency is achieved‚ usually when the mixture resembles soft-serve ice cream․ Scrape down the sides if needed and transfer to an airtight container for freezing․ Proper monitoring ensures a smooth‚ creamy final product․

Stopping the Machine

Once the churning cycle is complete‚ typically after 15 to 20 minutes‚ turn off the machine․ Over-churning can lead to an overly firm texture․ When stopping‚ ensure the machine is switched off properly to avoid any accidental operation․ Carefully remove the bowl‚ as it may still be cold․ Transfer the ice cream to an airtight container and place it in the freezer to harden for a firmer consistency․ Properly stopping the machine and handling the components ensures safety and maintains the quality of your homemade ice cream․

Troubleshooting Common Issues

Common issues include soft or runny ice cream‚ often due to improper freezing or mixture temperature․ Ensure the bowl is fully frozen and mixture is chilled before churning․

Ice Cream Too Soft or Runny

If your ice cream turns out too soft or runny‚ it may be due to improper freezing of the bowl or insufficient chilling of the mixture․ Ensure the freezer bowl is completely frozen (no liquid sound when shaken) and the mixture is chilled for at least 2 hours before churning․ Over-churning can also lead to a softer consistency․ To fix this‚ always follow the manufacturer’s instructions‚ monitor churning time‚ and stop once the desired thickness is achieved․ Proper preparation and timing are key to achieving the perfect texture․

Machine Not Churning Properly

If the machine fails to churn properly‚ ensure the freezer bowl is fully frozen (no liquid sound when shaken) and that it is properly aligned with the base․ Verify that the mixing paddle is securely attached and the lid is tightly closed․ Check the power cord connection and ensure the outlet is working․ If issues persist‚ consult the manual or manufacturer support․ Proper assembly and pre-freezing are crucial for optimal performance․ Always follow the manufacturer’s guidelines to avoid operational problems and achieve smooth‚ consistent churning․

Maintenance and Cleaning

Regular maintenance ensures longevity․ Wash all parts with warm soapy water‚ rinse thoroughly‚ and dry․ Avoid abrasive cleaners․ Store components properly to prevent damage and maintain hygiene․

Post-Use Cleaning Tips

Clean your Cuisinart Ice Cream Maker immediately after use for optimal maintenance․ Wash the mixing paddle‚ lid‚ and freezer bowl with warm soapy water․ Rinse thoroughly and dry to prevent water spots; Avoid using abrasive cleaners or scrubbers‚ as they may damage surfaces․ Regularly check for any residue and clean it promptly․ For tougher stains‚ soak parts in warm water before scrubbing gently․ Ensure all components are dry before storing to prevent bacterial growth․ Proper cleaning ensures longevity and maintains the machine’s performance for future use․

Storage and Longevity

Proper storage is key to maintaining your Cuisinart Ice Cream Maker’s longevity․ After cleaning‚ ensure all parts are completely dry to prevent rust or mold․ Store the freezer bowl in the freezer when not in use‚ but only after it’s clean and dry․ Keep other components in a cool‚ dry place‚ away from direct sunlight․ Avoid exposing the machine to high humidity or extreme temperatures․ Regularly inspect parts for wear and tear․ By following these steps‚ you’ll extend the life of your ice cream maker and ensure it performs optimally for years to come․

Additional Tips and Recipes

Experiment with unique flavor combinations like matcha‚ lavender‚ or caramel to create distinctive ice cream varieties․ These tips enhance both creativity and the final product’s texture and taste․

Optimizing Consistency

To achieve the best texture‚ ensure your mixture is chilled for at least 2 hours before churning․ This prevents ice crystals from forming‚ resulting in a smoother consistency․ The freezer bowl must be completely frozen‚ which typically takes 16-24 hours․ Shake the bowl to confirm—it’s ready when no liquid movement is heard․ During churning‚ stop once the mixture reaches your desired consistency; over-churning can lead to a softer texture․ For mix-ins‚ add them toward the end of the churning process to maintain even distribution without breaking down the texture․ These steps ensure a professional‚ creamy finish every time․

Recipe Ideas and Variations

Experiment with unique flavors like classic vanilla‚ rich chocolate‚ or fruity sorbet․ Add mix-ins such as chocolate chips‚ nuts‚ or fresh berries for texture and flavor․ For a creamier texture‚ use whole milk or heavy cream․ Try unique combinations like espresso for a mocha ice cream or cocoa powder for a chocolate base․ Gelatin can be added to sorbet mixtures for a smoother consistency․ Melted caramel or honey can enhance sweetness naturally․ Always chill mixtures thoroughly before churning and avoid over-churning for the best results․ These variations ensure endless creativity with your Cuisinart Ice Cream Maker․

The Cuisinart Ice Cream Maker is a versatile and user-friendly appliance that empowers home cooks to craft delicious‚ custom ice cream with ease․ By following simple instructions and tips‚ users can achieve professional-quality results․ Regular maintenance ensures longevity‚ while creative mix-ins and flavors allow for endless experimentation․ Whether making classic vanilla or unique variations‚ this machine delivers memorable treats for every occasion․ With proper care and use‚ it remains a reliable tool for ice cream enthusiasts‚ bringing joy and satisfaction to the art of homemade desserts․

tv guide for savannah georgia

Welcome to the Savannah TV Guide, your ultimate resource for discovering local and national channels, popular shows, and exclusive programming in Savannah, Georgia. Explore a wide range of entertainment, sports, and news channels tailored to diverse viewer preferences. Stay tuned for updates!

Local Channels in Savannah

Savannah, Georgia, boasts a diverse range of local TV channels that cater to the community’s entertainment, news, and educational needs. These channels provide hyper-local content, ensuring residents stay informed about local events, weather, and sports. Major network affiliates such as ABC, CBS, NBC, and FOX are available, offering a mix of national and regional programming.

Some of the prominent local channels include CH 3.1, CH 3.2, and CH 3.3, each featuring unique shows and schedules. For instance, CH 3.1 airs popular series like Suits LA at 6:00 PM, while CH 3.3 broadcasts Interview With a Killer at 5:00 PM. These channels also cover local news, ensuring viewers are up-to-date on Savannah’s latest developments.

Additionally, local channels often highlight community events, such as festivals, parades, and sports games. This makes them a vital source of information for both residents and visitors. With a variety of programming options, Savannah’s local TV channels provide something for everyone, from entertainment to educational content.

Viewers can access these channels through traditional antennas, cable providers, or streaming services, making it easy to stay connected to local happenings. Whether you’re interested in news, sports, or lifestyle shows, Savannah’s local TV channels deliver a wealth of content tailored to the community.

Popular Cable TV Channels

Savannah, Georgia, offers a wide array of popular cable TV channels that cater to diverse viewer preferences. These channels provide access to national and international content, ensuring a rich entertainment experience. Among the most-watched cable channels are CNN, ESPN, HGTV, Food Network, and Discovery Channel.

CNN and Fox News are staples for news enthusiasts, offering 24/7 coverage of local, national, and global events. Sports fans can enjoy ESPN, which broadcasts live games, highlights, and sports analysis. For lifestyle and home improvement content, HGTV and Food Network are favorites, featuring shows like Property Brothers and Diners, Drive-Ins, and Dives.

Discovery Channel and AMC provide a mix of documentaries, reality TV, and critically acclaimed series. These channels ensure that viewers in Savannah have access to a variety of genres, from educational programming to gripping dramas. With such a diverse lineup, cable TV in Savannah remains a popular choice for entertainment and information.

Whether you’re a sports fanatic, a foodie, or a movie buff, Savannah’s cable TV offerings have something for everyone. The combination of national networks and premium channels makes it easy to find content that suits any interest or mood.

Streaming Services Available in Savannah

Streaming services have become a popular choice for entertainment in Savannah, offering a wide range of options for viewers. Major platforms like Netflix, Hulu, Amazon Prime Video, and Disney+ provide access to movies, TV shows, and original content. These services allow users to stream their favorite programs on-demand, with the flexibility to watch anytime and anywhere.

Netflix remains one of the most widely used streaming services, featuring a diverse library of content, including popular series like Stranger Things and The Crown. Hulu is another favorite, offering a mix of current TV shows, movies, and exclusive originals. Amazon Prime Video stands out with its extensive collection of films and original series like The Lord of the Rings: The Rings of Power.

Disney+ is a go-to for families, with a vast array of content from Disney, Marvel, Star Wars, and Pixar. HBO Max and Paramount+ also provide high-quality programming, including hit series and blockbuster movies. These streaming services offer Savannah residents a convenient and affordable way to enjoy their favorite shows without traditional cable subscriptions.

With so many options available, streaming services in Savannah cater to every viewer’s preferences, ensuring endless entertainment possibilities at their fingertips.

Sports Channels

Sports enthusiasts in Savannah have access to a variety of channels that cater to their passion for athletics. ESPN is a top choice, offering extensive coverage of football, basketball, baseball, and other sports. FOX Sports provides live events like MLB and NFL games, while CBS Sports and NBC Sports deliver comprehensive coverage of sports news, highlights, and live events.

For baseball fans, the MLB Network broadcasts games and exclusive content. Football enthusiasts can tune into the NFL Network for in-depth analysis and live coverage. Basketball lovers enjoy NBA TV, featuring live games and behind-the-scenes stories. Hockey fans can watch their favorite teams on the NHL Network.

The SEC Network is a must-watch for college sports fans, showcasing games and analysis from the Southeastern Conference. These sports channels ensure that Savannah residents can stay connected to their favorite sports and teams, with live broadcasts, highlights, and expert commentary.

Entertainment Channels

Savannah’s TV guide offers a diverse range of entertainment channels to suit every viewer’s taste. Major networks like ABC, CBS, FOX, and NBC provide popular primetime shows, such as Grey’s Anatomy, The Voice, and NCIS, ensuring a steady stream of drama, comedy, and reality TV.

Cable channels like AMC and FX feature critically acclaimed series, including The Walking Dead and American Horror Story, while TBS and TNT offer a mix of comedy specials, movies, and original programming. For movie enthusiasts, channels like TCM (Turner Classic Movies) showcase timeless classics.

Premium channels such as HBO and Showtime deliver exclusive content, including hit series like House of the Dragon and Billions, as well as original movies and documentaries. Additionally, streaming services like Netflix, Hulu, and Amazon Prime are widely accessible in Savannah, offering on-demand access to a vast library of entertainment content.

With such a wide array of entertainment options, viewers in Savannah can enjoy a rich and varied television experience tailored to their preferences.

Movie Channels

Movies are a central part of Savannah’s TV guide, offering viewers a variety of channels dedicated to cinematic experiences. Channels like HBO, SHOWTIME, and STARZ provide access to the latest blockbusters and exclusive original films. TBS and TNT feature a mix of classic movies and contemporary hits, catering to diverse tastes.

AMC and The Movie Channel focus on showcasing iconic films, including timeless classics and indie favorites. Additionally, channels like FXM and SundanceTV offer curated selections of critically acclaimed movies, ensuring there’s something for every film enthusiast.


Many of these channels also offer on-demand services, allowing viewers to watch their favorite movies at any time. With such a wide range of movie channels available, Savannah residents can enjoy a cinematic experience from the comfort of their homes.

Whether you’re in the mood for action, drama, comedy, or horror, Savannah’s TV guide has a movie channel to satisfy your cravings;

Family and Kids’ Channels

Families in Savannah can enjoy a variety of TV channels tailored to both children and parents. Channels like Nickelodeon and Cartoon Network feature popular kids’ shows such as SpongeBob SquarePants and Adventure Time, ensuring endless entertainment for younger audiences.

Disney Channel offers a mix of family-friendly content, including classic series like Hannah Montana and modern hits like High School Musical: The Musical: The Series. Meanwhile, PBS Kids provides educational programming, such as Sesame Street and Wild Kratts, designed to engage and educate children.

Additional family-oriented channels include Universal Kids and Discovery Family, which offer a blend of entertaining and educational shows. These channels ensure that there’s something for every age group and interest, making family time more enjoyable.

Many of these channels also provide on-demand services, allowing families to watch their favorite shows at any time. With such a diverse selection, Savannah’s TV guide caters to families seeking both fun and educational content for their children.

News Channels

Savannah residents have access to a wide range of local and national news channels, ensuring they stay informed about current events. Major networks like CNN, FOX News, and MSNBC provide 24/7 coverage of national and international news, while local stations such as WSAV and WTOC focus on regional stories, weather, and community updates.

For those interested in unbiased reporting, NPR and PBS NewsHour offer in-depth analysis and investigative journalism. Additionally, CBS News and ABC News deliver breaking news and feature segments on topics like politics, health, and technology.

Local news channels often air segments highlighting Savannah’s history, cultural events, and environmental initiatives. These channels are a great resource for staying connected to the community and understanding local issues.

With such a diverse selection of news channels, viewers in Savannah can choose the sources that best align with their interests and preferences, ensuring they remain well-informed about both global and local matters.

Viewer’s Guide to Planning Your TV Schedule

Planning your TV schedule in Savannah is easier than ever with the right tools and strategies. Start by identifying your favorite shows and channels, then use a TV guide or app to track airing times. Prioritize live events, sports, and new episodes to avoid missing out on must-watch content.

Use the Savannah TV guide to create a personalized schedule. Highlight or bookmark shows you want to watch, and set reminders on your device. For DVR users, record episodes of your favorite series to watch later. Mix genres to keep your viewing experience diverse, from news and sports to movies and family-friendly content.

Stay updated on local listings for channels like WSAV, WTOC, and others. Check for special programming, marathons, or premieres. By organizing your TV time, you can enjoy a seamless and enjoyable viewing experience tailored to your preferences.

mwe borehole design manual

The MWE Borehole Design Manual provides comprehensive guidelines for designing and constructing boreholes, addressing hydrogeological assessments, drilling methods, and material selection․ It ensures sustainable water supply while adhering to safety and regulatory standards, as highlighted in recent applications and case studies․

Key Considerations in Borehole Design

Borehole design requires careful consideration of hydrogeological conditions, environmental impact, and sustainability․ Proper site selection, drilling methods, and material quality ensure optimal performance and compliance with regulatory standards, as outlined in the manual․

2․1․ Hydrogeological Assessment and Site Selection

A thorough hydrogeological assessment is critical for successful borehole design․ This involves analyzing groundwater flow, aquifer properties, and water quality․ Site selection must consider geological stability, environmental impact, and accessibility․ Proper data collection ensures optimal borehole placement, maximizing water yield while minimizing risks․

2․2․ Design Parameters and Drilling Methods

Design parameters are critical in borehole construction, encompassing depth, diameter, and material specifications․ These elements must align with hydrogeological conditions and intended use․ Drilling methods, such as rotary or percussion, are chosen based on aquifer depth and geology․ Proper alignment ensures efficiency and sustainability, balancing cost and environmental impact․

2․3․ Materials Selection and Construction Process

Material selection is vital for borehole durability and functionality․ Casing and screening materials, such as stainless steel or PVC, are chosen for their resistance to corrosion and strength․ The construction process involves precise installation of these components to prevent contamination and ensure optimal water flow․ Quality control measures are essential throughout the process to meet safety and performance standards․ Regular inspections and adherence to established guidelines ensure long-term reliability and sustainability of the borehole․ Proper material selection and construction practices are fundamental to achieving a successful and enduring water supply solution․

Borehole Construction Process

The borehole construction process involves site preparation, drilling, casing installation, and final testing․ It requires careful planning and execution to ensure safety, efficiency, and long-term functionality of the borehole․ Proper techniques and materials are essential․

3․1․ Casing and Screening Installation

Casing and screening installation are critical steps in borehole construction, ensuring structural integrity and water flow efficiency․ The casing prevents collapse and protects the borehole from contamination, while the screen allows water to enter․ Proper material selection, based on hydrogeological conditions, is essential to prevent corrosion and clogging․ The casing is typically made of durable materials like stainless steel or PVC, chosen for their resistance to environmental factors․ Screens are designed with specific slot sizes to optimize water intake while filtering out sediment․ Installation must follow precise methods to avoid damage and ensure a secure fit․ Regular maintenance, such as cleaning and inspecting the casing and screen, is necessary to sustain borehole performance․ Factors like water quality and surrounding rock stability also influence the design and installation process, ensuring the borehole remains functional and reliable over time․ This step is pivotal in achieving a successful and sustainable water supply system․

3․2․ Safety Considerations and Best Practices

Safety is paramount in borehole construction to protect workers, equipment, and the environment․ The MWE Borehole Design Manual emphasizes adhering to strict safety protocols, including proper use of personal protective equipment (PPE) and regular equipment inspections․ Drilling operations must be conducted in well-ventilated areas to prevent inhalation of harmful fumes․ Emergency response plans, such as fire extinguishers and first aid kits, should always be on site․ Proper handling and storage of drilling fluids and chemicals are critical to avoid contamination and accidents․ Additionally, all personnel must undergo training on operational procedures and safety standards․ Environmental protection measures, such as containing drilling waste, are also essential․ Compliance with local regulations and industry standards ensures a safe and sustainable drilling process․ By following these guidelines, the risks associated with borehole construction can be minimized, ensuring a secure and efficient operation․ Regular audits and safety audits further reinforce these practices, promoting a culture of safety throughout the project lifecycle․

Monitoring and Maintenance of Boreholes

Regular monitoring ensures borehole performance and longevity․ Water quality testing, flow rate measurements, and equipment inspections are essential․ Maintenance involves clearing blockages and servicing pumps to sustain optimal productivity and prevent premature degradation․

4․1․ Performance Monitoring and Data Analysis

Performance monitoring is crucial for ensuring a borehole operates efficiently․ Key metrics include water flow rates, pressure levels, and pump performance․ Data analysis helps identify trends, such as declining yields or increased energy use, which may signal issues․ Regular water quality testing is also conducted to ensure the water meets safety standards․ By analyzing this data, operators can make informed decisions, such as adjusting pumping rates or scheduling maintenance․ Advanced tools, like sensors and software, enable real-time monitoring, allowing for prompt responses to changes․ This proactive approach minimizes downtime and extends the borehole’s lifespan․ Proper documentation of all data ensures compliance with regulatory requirements and provides valuable insights for future borehole designs․ Effective monitoring and analysis are essential for optimizing resource use and maintaining reliable water supply systems․

Regulatory Compliance and Safety Standards

Regulatory compliance and safety standards are paramount in borehole design to ensure environmental protection and public health․ The MWE Borehole Design Manual outlines adherence to local, national, and international regulations, such as those related to water quality and construction practices․ Safety standards cover all phases, from drilling to long-term operation, emphasizing proper casing installation and material quality․ Compliance also involves obtaining necessary permits and conducting environmental impact assessments to mitigate potential risks․ Regular inspections and audits ensure adherence to these standards, while documentation provides transparency and accountability․ By integrating regulatory requirements into every aspect of borehole design, the manual helps prevent legal issues and fosters sustainable practices․ This section underscores the importance of aligning borehole projects with established guidelines to safeguard both the environment and communities․ Proper compliance ensures the longevity and safety of water supply systems․

Case Studies and Real-World Applications

This section highlights real-world applications of the MWE Borehole Design Manual, showcasing successful projects and lessons learned․ A notable case study involves a 90ft water-filled borehole where a 1HP submersible pump was installed but initially failed to lift water, emphasizing the importance of proper design and installation․ Another example demonstrates how the manual’s guidelines ensured sustainable water supply in urban resilience projects, addressing hidden spatial relations and patterns․ Additionally, the manual has been applied in large-scale infrastructure developments, such as the FTTH-Factory project, where agile workflows and DevOps practices were implemented to enhance efficiency․ These case studies illustrate the practical value of the manual in diverse scenarios, from addressing technical challenges to supporting innovative solutions․ By documenting these experiences, the manual provides actionable insights for future borehole design and construction projects․

Future Trends in Borehole Design Technology

The future of borehole design technology is poised for significant advancements․ Integrating technologies like cloud-based platforms and machine learning will enhance data analysis and prediction capabilities․ For instance, serverless architectures and COGs (Cloud-Optimized Georeferenced Data) enable faster and more scalable applications for raster data queries, crucial for hydrogeological assessments․ Additionally, the adoption of agile workflows and DevOps practices, as seen in projects like the FTTH-Factory, promises to streamline borehole construction processes․ Innovations in materials science may lead to more durable and eco-friendly casing and screening materials․ Furthermore, advancements in drilling technologies, such as rotary drilling with improved efficiency, could reduce costs and environmental impact․ Data-driven insights from performance monitoring will also play a pivotal role in optimizing borehole design and maintenance․ These emerging trends highlight the potential for more sustainable and efficient borehole solutions, aligning with global demands for resilient water supply systems․

lien waiver form florida pdf

Lien waivers are crucial for ensuring timely payments and protecting rights in Florida construction projects. They serve as proof of payment, preventing lien claims and ensuring project smoothness.

Types of Lien Waivers in Florida

Florida recognizes conditional and unconditional lien waivers, as well as waivers related to payment bonds, each tailored for specific payment situations in construction projects, ensuring clarity and protection.

  • Conditional Lien Waivers
  • Unconditional Lien Waivers
  • Waiver of Right to Claim Against Payment Bond

2.1 Conditional Lien Waivers

A Conditional Lien Waiver in Florida is a legal document that waives a contractor’s or subcontractor’s right to file a lien against a property, but only under specific conditions. Typically, this waiver becomes effective once the payment has been made and received. It is commonly used during construction projects to ensure that once payment is made, the lien rights are forfeited. This type of waiver is governed by Florida Statutes, specifically Section 713.20, which outlines the requirements and format for such documents. Conditional lien waivers are crucial for protecting property owners from potential liens after payments have been made, ensuring the smooth progression of construction projects. They are often used alongside other types of lien waivers to provide comprehensive payment security in the construction industry.

2.2 Unconditional Lien Waivers

An Unconditional Lien Waiver in Florida is a legal document that permanently relinquishes a contractor’s or subcontractor’s right to file a lien against a property; Unlike conditional waivers, unconditional waivers do not depend on payment being made or received. They are often used after final payments have been issued, ensuring that the property owner is fully protected from any future lien claims. This type of waiver is irrevocable and provides permanent peace of mind for property owners. Florida Statutes, specifically Section 713.20, govern the format and requirements for unconditional lien waivers, ensuring compliance and enforceability. By executing this document, lienors forfeit their right to claim a lien, making it a critical tool for securing payment rights and maintaining project continuity in the construction industry.

2.3 Waiver of Right to Claim Against Payment Bond

A Waiver of Right to Claim Against Payment Bond is a specific type of lien waiver used in Florida construction projects. This document waives the lienor’s right to pursue claims against a payment bond, which is typically required on public projects to ensure payment to contractors and subcontractors. By signing this waiver, the lienor relinquishes their ability to make claims against the bond, providing the project owner or general contractor with assurance that payment bond funds are no longer at risk. This waiver is distinct from other types, as it specifically addresses payment bond rights rather than liens on the property itself. Florida law prescribes the form and requirements for this waiver, ensuring compliance and protecting all parties involved in the construction process. It is commonly used during project close-out to finalize payments and releases.

Legal Requirements for Lien Waivers

Florida Statutes, particularly Section 713.20, govern lien waivers, requiring strict adherence to statutory forms. Deviations are prohibited, and notarization is optional, ensuring legal compliance and protecting all parties involved.

3.1 Overview of Florida Statutes (e.g., Section 713.20)

Section 713.20 of the Florida Statutes outlines the legal framework for lien waivers, mandating the use of specific forms. This statute ensures that lienors and owners adhere to standardized procedures, preventing disputes. It prohibits the use of non-statutory forms, maintaining consistency and fairness in construction transactions. Compliance with Section 713.20 is essential to avoid legal complications, as deviations from the prescribed forms can lead to enforceability issues. The statute also clarifies that while notarization is optional, it does not affect the validity of the waiver. By following these guidelines, all parties involved in Florida construction projects can ensure that their rights are protected and that payments are processed efficiently. This section plays a pivotal role in maintaining the integrity of the construction payment process in Florida.

3.2 Prohibition on Non-Statutory Forms

Florida law strictly prohibits the use of lien waiver forms that deviate from the statutory templates outlined in Section 713.20. This ensures fairness and consistency in construction transactions. Any waiver or release that does not conform to the prescribed forms is considered unenforceable, potentially leading to legal disputes. The statute safeguards all parties by preventing the imposition of non-compliant terms. This prohibition applies to both conditional and unconditional lien waivers, ensuring that all stakeholders adhere to the same standards. By mandating the use of statutory forms, Florida law minimizes confusion and protects the rights of contractors, subcontractors, and property owners. While notarization is optional, adherence to the statutory format is non-negotiable to maintain the integrity of the payment process in construction projects.

Benefits of Using Lien Waiver Forms

Lien waiver forms provide significant advantages in Florida construction projects, ensuring clarity and fairness in payment processes. They serve as proof of payment, reducing the risk of lien claims and disputes. By using these forms, contractors and subcontractors can verify that payments have been made, fostering trust and transparency. Lien waivers also streamline project documentation, making it easier to track payments and avoid delays. Additionally, they protect property owners from potential liens, ensuring the project proceeds smoothly. The use of statutory forms guarantees compliance with Florida law, minimizing legal risks. Overall, lien waivers are essential for maintaining efficient and secure payment practices in the construction industry, benefiting all parties involved.

How to Complete a Lien Waiver Form

Completing a lien waiver form in Florida involves several key steps to ensure accuracy and compliance with state laws. First, download the statutory form prescribed by Section 713.20 of the Florida Statutes, as non-compliant forms are prohibited. Fill in the required details, including the names and addresses of all parties involved, such as the contractor, subcontractor, and property owner. Clearly describe the project, including the property address and a brief description of the work performed or materials supplied. Specify whether the waiver is conditional or unconditional, depending on whether payment has been received. Include the payment amount, method, and date to avoid future disputes. Ensure the waiver is specific to the work or materials provided to prevent ambiguity. Review the form for errors and consider having it notarized, although it’s not mandatory. Finally, obtain signatures from all relevant parties and retain copies for your records. Using lien waiver management software can also streamline the process and improve efficiency.

Common Mistakes to Avoid

When completing a Florida lien waiver form, avoid using non-statutory forms, as they are prohibited under Section 713.20. Ensure all details, such as project descriptions and payment specifics, are accurate and complete. Never omit the type of waiver (conditional or unconditional) or fail to specify the payment status. Avoid using unapproved templates from third-party sources, as they may not comply with state laws. Do not forget to retain a copy of the signed waiver for your records, as this protects you in case of disputes. Additionally, avoid neglecting to have the form notarized if desired, though it’s not required. Finally, never ignore legal advice to ensure compliance with Florida’s lien waiver regulations.

Best Practices for Using Lien Waivers

Always use the statutory lien waiver forms prescribed by Section 713.20 of the Florida Statutes to ensure compliance. Carefully complete all sections of the form, including project details, payment information, and the type of waiver (conditional or unconditional). Retain a copy of the signed waiver for your records, as it serves as proof of payment and protects your rights. Understand the difference between conditional and unconditional waivers to avoid unintended consequences. Ensure the waiver is executed after payment has been made or is expected to be made; Verify that the waiver aligns with the specific requirements of your project and complies with Florida’s lien laws. Consider consulting legal counsel to address any questions or disputes related to lien waivers.

Downloading and Using Florida Lien Waiver Forms

Downloading and using Florida lien waiver forms is straightforward, with many free, legally compliant templates available online. Websites like The Notice Zone and Levelset offer downloadable PDF forms that meet Florida’s statutory requirements. Ensure the form you use is specific to Florida and complies with Section 713.20 of the Florida Statutes. When downloading, verify that the form matches your needs, such as conditional or unconditional waivers. Fill out the form accurately, including project details, payment amounts, and signatures. Always retain a copy for your records. Some forms may require notarization, though it’s not mandatory under Florida law. Using these forms helps streamline payment processes and reduces the risk of disputes. By following these steps, you can ensure compliance and protect your rights in construction projects.

Importance of Lien Waivers in Construction Projects

Lien waivers are essential for protecting contractors and property owners by preventing liens and ensuring timely payments. They provide clear documentation of payments made, reducing potential disputes and conflicts. By using lien waivers, contractors can ensure smooth cash flow and maintain good relationships with clients. These documents also offer legal protection, ensuring that all parties’ rights are safeguarded. As a result, lien waivers play a critical role in the successful completion of construction projects.

Lien waivers are a fundamental aspect of Florida construction projects, ensuring that payments are made smoothly and that all parties’ rights are protected. By understanding the different types of lien waivers and adhering to legal requirements, contractors and property owners can avoid potential disputes and maintain successful project outcomes. The use of statutory forms, such as those outlined in Section 713.20 of the Florida Statutes, ensures compliance and prevents unnecessary legal complications. Proper management of lien waivers not only facilitates timely payments but also strengthens relationships between contractors, subcontractors, and property owners. It is essential for all parties involved in construction projects to familiarize themselves with lien waiver forms and their proper use to ensure a hassle-free experience. By doing so, they can safeguard their interests and contribute to the efficient completion of construction projects in Florida.