breadmaster bread machine manual

BreadMaster Bread Machine Manual: A Comprehensive Guide
Welcome! This manual provides detailed instructions for your BreadMaster machine, enabling effortless artisan-quality bread baking at home. Enjoy fresh, warm loaves easily!
Understanding Your BreadMaster Machine
Your BreadMaster 2lb Programmable Bread Maker is engineered for simplicity and consistent results. It’s designed to automate the bread-making process, from mixing and kneading to rising and baking – all within a single appliance. This machine offers 12 unique bread settings, catering to diverse preferences, including options for low-carb and gluten-free baking.
The machine’s capabilities extend beyond basic loaves; it can also prepare dough for pastries, pizzas, and more. The digital display and pre-programmed settings ensure user-friendly operation, even for beginners. With three loaf size options (1lb, 1.5lb, and 2lb) and adjustable crust colors (light, medium, dark), you have complete control over your bread’s characteristics. The fruit and nut dispenser adds ingredients at the optimal moment, enhancing complexity without manual intervention.
Key Features and Benefits
The BreadMaster boasts 17-in-1 functionality, offering versatility beyond standard bread making – including jam and dough cycles. Enjoy bakery-quality results at home with its 12 pre-programmed settings, accommodating gluten-free and low-carb diets. A standout feature is the fruit and nut dispenser, ensuring perfectly timed additions for enhanced flavor.
Benefit from three loaf size options (1, 1.5, and 2lbs) and customizable crust colors (light, medium, dark) for tailored results. The 15-hour delay timer and one-hour keep-warm function provide convenience, delivering fresh bread when you desire. Its stainless steel construction and non-stick interior simplify cleaning, while the beginner-friendly controls ensure ease of use. Slices fit standard toasters!
Parts Identification
Your BreadMaster machine comprises several key components. The housing, constructed from durable stainless steel, encases all internal mechanisms. The non-stick baking pan is where the magic happens, easily removable for cleaning. A kneading paddle, crucial for dough development, is included. Locate the heating element within the machine, responsible for baking.
The control panel features a digital display and buttons for selecting settings. The fruit and nut dispenser is a separate compartment for timed ingredient additions. A viewing window allows monitoring during baking. Ensure the lid seals securely. Familiarize yourself with the power cord and its connection point. Proper understanding of these parts ensures safe and efficient operation.
Getting Started: First Use & Setup
Initial preparation is key! Before baking, thoroughly clean all removable parts with warm, soapy water, then dry completely for optimal results.
Initial Setup and Cleaning
Unboxing and Preparation: Carefully remove your BreadMaster from its packaging. Before the first use, it’s crucial to thoroughly clean all components that come into contact with food. This ensures a hygienic baking environment and removes any manufacturing residue.
Cleaning Removable Parts: The baking pan, kneading paddle, and fruit & nut dispenser (if applicable) are typically removable. Wash these parts in warm, soapy water. Avoid abrasive cleaners, as they can damage the non-stick coating. Rinse thoroughly and allow to air dry completely.
Wiping Down the Machine: Wipe the exterior of the BreadMaster machine with a damp cloth. Do not immerse the machine in water or any other liquid. Ensure the power cord is unplugged during cleaning. A clean machine guarantees optimal performance and longevity. Proper initial setup is vital for delicious results!
Control Panel Overview
Digital Display: The BreadMaster features a clear digital display showing the selected program, baking time, and any error codes. Familiarize yourself with the display’s indicators for optimal operation.
Program Selection: Utilize the program selection buttons to choose from 12 unique bread settings, including basic, whole wheat, gluten-free, and low-carb options. Each program is pre-programmed for ideal baking conditions.
Crust Control: Adjust the crust color to your preference using the crust control buttons – light, medium, or dark. This allows for personalized bread texture and appearance.
Timer & Start/Stop: The 15-hour delay start timer enables convenient overnight baking. The Start/Stop button initiates or pauses the baking process. Understanding these controls unlocks the BreadMaster’s full potential!

Baking Your First Loaf
Let’s begin! Follow the basic white bread recipe for a delightful introduction to your BreadMaster. Enjoy the aroma of homemade goodness!

Basic White Bread Recipe
Yields: 2lb loaf
Prep time: 10 minutes
Cook time: Approximately 3 hours (including rise time)
Ingredients:
- 3 cups (360g) bread flour
- 1 ¼ cups (300ml) warm water (105-115°F / 40-46°C)
- 2 tablespoons (30ml) vegetable oil
- 1 ½ teaspoons (7g) salt
- 2 ¼ teaspoons (7g) active dry yeast (1 packet)
- 1 tablespoon (15ml) sugar
Instructions:
- Add ingredients to the bread machine pan in the order listed above. Always add yeast last!
- Select the “Basic” or “White Bread” setting on your BreadMaster.
- Choose your desired loaf size (2lb) and crust color (light, medium, or dark).
- Press “Start” and let the machine work its magic!
- Once the cycle is complete, carefully remove the loaf and let it cool completely before slicing;
Enjoy your freshly baked bread!
Ingredient Measurement & Quality
Accuracy is key! Precise measurements are crucial for successful bread baking with your BreadMaster. Use dry measuring cups for flour, sugar, and yeast, and liquid measuring cups for water and oil. Level off dry ingredients for consistent results.
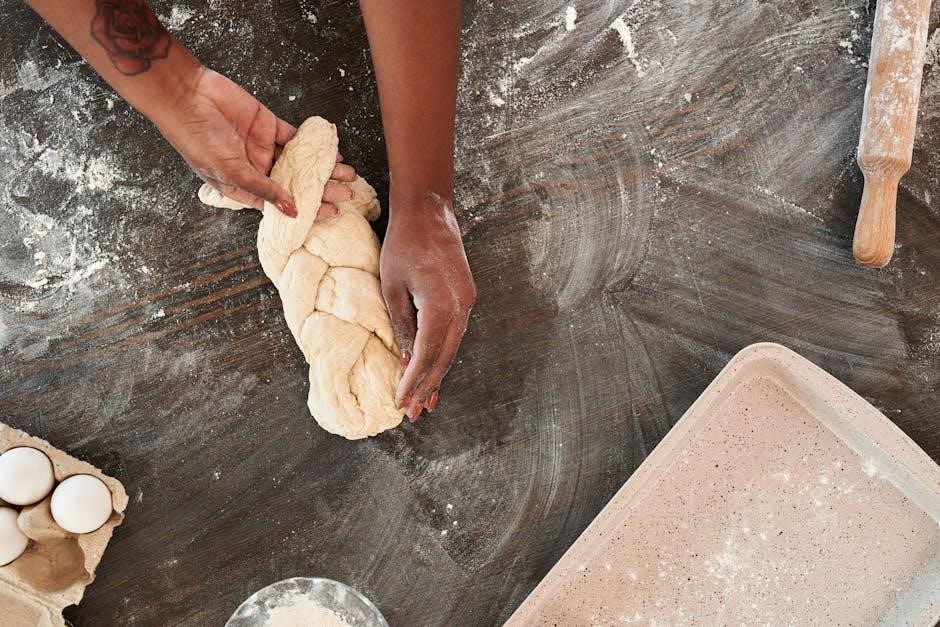
Flour Power: Bread flour, with its higher protein content, yields a chewier texture. All-purpose flour can be used, but the loaf may be less structured.
Yeast Vitality: Ensure your yeast is fresh! Expired yeast won’t activate properly. Warm water (105-115°F) is ideal for activating yeast.
Quality Counts: Using high-quality ingredients will significantly enhance the flavor and texture of your bread. Fresh, flavorful ingredients make all the difference!
Advanced Baking Techniques
Expand your baking! Explore features like the fruit & nut dispenser, gluten-free settings, and low-carb recipes for diverse, delicious bread creations.
Using the Fruit & Nut Dispenser
Enhance your loaves with delightful additions! The BreadMaster’s fruit and nut dispenser automatically adds ingredients at the optimal moment during the baking cycle. This ensures even distribution and prevents delicate items from becoming crushed during initial kneading.
Simply add your desired fruits, nuts, seeds, or chocolate chips into the dispenser compartment before starting the baking process. The machine will handle the rest, dropping them into the dough at the perfect time. This feature allows for effortless creation of more complex and flavorful bread recipes without any manual intervention.
Experiment with different combinations to discover your favorites! Remember to check the recipe instructions for recommended dispenser usage, as timing can vary depending on the chosen bread setting.
Gluten-Free Baking with BreadMaster
Enjoy delicious gluten-free bread with ease! The BreadMaster features a dedicated gluten-free setting, specifically designed to accommodate gluten-free flour blends. This setting adjusts kneading and rising times to achieve optimal results with gluten-free ingredients, which behave differently than traditional wheat flour.
When using the gluten-free setting, it’s crucial to use a high-quality gluten-free bread flour blend that includes xanthan gum or another binding agent. These ingredients are essential for providing structure and texture to gluten-free loaves.
Refer to gluten-free bread recipes specifically formulated for bread machines for best results. Experiment with different blends to find your preferred taste and texture!
Low-Carb Bread Recipes
Achieve guilt-free indulgence with low-carb bread! The BreadMaster simplifies creating delicious, low-carbohydrate bread varieties right in your kitchen. Utilizing the dedicated low-carb setting, the machine adjusts baking parameters to suit alternative flours like almond flour, coconut flour, and flaxseed meal.
These flours require different hydration levels and baking times compared to wheat flour, and the low-carb setting accounts for these differences. Remember to use recipes specifically designed for low-carb bread machines for optimal texture and rise.
Experiment with various low-carb flours and sweeteners to customize your bread to your liking. Enjoy fresh, healthy bread without compromising your dietary goals!

Troubleshooting Common Issues
Don’t worry about baking mishaps! This section offers solutions for common problems like rising issues, crust color adjustments, and deciphering error codes.
Bread Not Rising Properly
Is your dough falling flat? Several factors can contribute to insufficient rise. First, ensure your yeast is fresh; expired yeast won’t activate properly. Check the expiration date and store yeast in an airtight container.
Ingredient accuracy is crucial. Measure ingredients precisely, especially yeast and liquids. Too much liquid can create a slack dough, while too little hinders rising.
Temperature matters! Ensure ingredients are at room temperature unless the recipe specifies otherwise. Cold ingredients slow down yeast activity. Also, avoid placing the bread machine in a drafty area.

Consider the cycle selected. Some cycles have shorter rising times. For higher loaves, choose a longer cycle or a dedicated ‘dough’ cycle followed by a second rise and bake.

Finally, check the paddle is securely attached, as a loose paddle can prevent proper kneading and rising.
Crust Color Adjustments
Achieving your perfect crust color is simple! Your BreadMaster machine offers three crust settings: light, medium, and dark. These settings control the duration of the final baking phase, directly impacting the crust’s shade.
Experiment to find your preference. Start with the medium setting for a balanced color. If you prefer a paler crust, select ‘light’. For a deeply golden and crispier crust, choose ‘dark’.
Humidity and ingredient variations can affect results. Higher humidity may lead to a darker crust, even on the ‘medium’ setting. Similarly, using ingredients like honey or molasses will naturally darken the crust.
Observe your loaves! Note the crust color after each bake and adjust the setting accordingly for consistent results. Don’t be afraid to experiment!
Remember, you can pause the machine during the last few minutes to check the crust’s progress.
Error Codes and Solutions
Encountering an error code? Don’t worry, most issues are easily resolved. Your BreadMaster machine utilizes error codes to indicate specific problems during the baking process.
“Err 1” typically indicates a power interruption or a significant temperature fluctuation. Ensure the machine is securely plugged in and the power supply is stable.

“Err 2” often signals an issue with the kneading blade. Check if the blade is properly attached and isn’t obstructed by ingredients.
“Err 3” suggests a heating element malfunction. Disconnect the machine and contact customer support for assistance.
Always consult the full error code list in the appendix of this manual for a comprehensive guide. Restarting the machine can sometimes resolve minor glitches.
If the error persists, do not attempt to repair the machine yourself; contact qualified service personnel.

Maintenance and Care
Keep your BreadMaster in top condition! Regular cleaning and proper storage ensure longevity and optimal performance for years of delicious baking.
Cleaning Your BreadMaster
Maintaining cleanliness is crucial for optimal performance and longevity of your BreadMaster. Always unplug the machine and allow it to cool completely before cleaning. The baking pan and kneading blade are non-stick coated; hand wash them with warm, soapy water, and avoid abrasive cleaners or scouring pads.
The exterior of the machine can be wiped down with a damp cloth. Never immerse the bread maker base in water or any other liquid. Ensure no water enters the control panel. For stubborn residue inside the baking pan, soak it in warm water for easier removal.
Dry all parts thoroughly before reassembling. Regular cleaning prevents buildup and ensures consistently delicious results. A clean machine is a happy machine, ready for your next baking adventure!
Storage Instructions
Proper storage extends the life of your BreadMaster machine. Before storing, ensure the unit is completely cool and dry. Clean the baking pan and kneading blade thoroughly, as residual dough can attract pests. Store the bread maker in a cool, dry place, away from direct sunlight and moisture.
Avoid storing it in areas prone to extreme temperatures or humidity. If storing for an extended period, consider placing the machine in its original packaging or covering it with a dust cloth. Keep the power cord neatly coiled and stored with the machine.
Ensure children and pets cannot access the stored appliance. Following these simple steps will keep your BreadMaster in excellent condition for years of baking enjoyment!